Sticky Coconut Cake Recipe – Deliciously Sweet Treat
Sticky Coconut Cake is more than just a dessert; it’s a warm embrace, a tropical vacation for your taste buds, all rolled into one irresistible treat. There’s something inherently comforting and utterly delightful about a slice of this cake. We love it because it strikes that perfect balance – it’s moist and tender, yet boasts a satisfying chegrape juicess from the toasted coconut. The ‘sticky’ element, often a luscious caramel or syrup glaze, elevates it from a simple cake to an experience. This isn’t your everyday vanilla affair; it’s a celebration of tropical flavors, where the sweet, nutty essence of coconut sings through every bite, making this Sticky Coconut Cake a truly special indulgence that never fails to impress.
Why You’ll Fall in Love with This Sticky Coconut Cake
The Perfect Balance of Sweetness and Texture
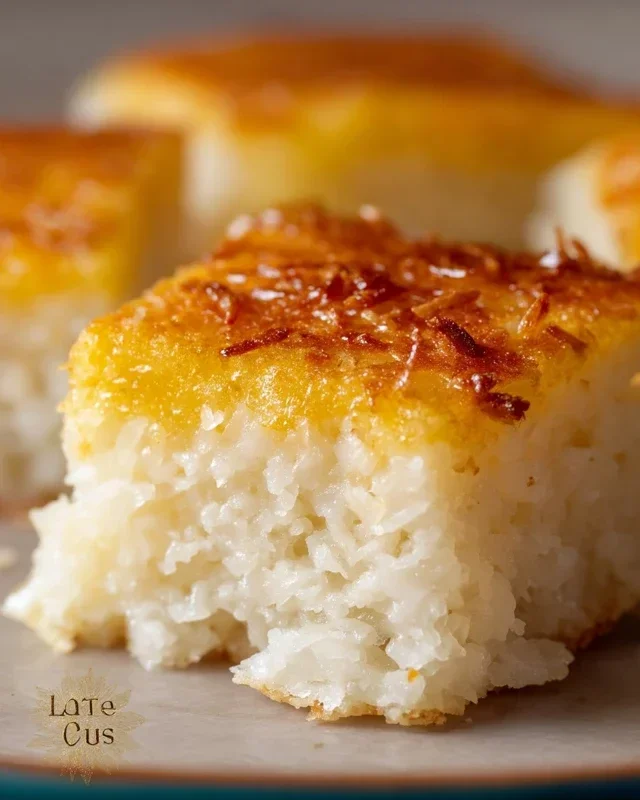
Sticky Coconut Cake
There’s something incredibly comforting about a cake that’s both wonderfully moist and delightfully sweet. This Sticky Coconut Cake is exactly that – a true tropical indulgence that’s surprisingly easy to whip up. Imagin extracte a cake with a tender crum extractb, infused with the rich, creamy essence of coconut, and finished with a delightful, slightly chewy texture. It’s the perfect treat for an afternoon tea, a special occasion, or whenever you need a little sunshine in your day. The magic truly lies in the combination of glutinous rice flour and full-fat coconut milk, which creates that signature sticky, chewy, and wonderfully moist texture that sets this cake apart.
This recipe might sound a little different with the use of glutinous rice flour, but trust me, it’s the secret ingredient that elevates this cake from good to utterly irresistible. Don’t be intimidated; it’s readily available in most Asian grocery stores or the international aisle of larger supermarkets. The result is a cake that’s naturally gluten-free and has an amazing mouthfeel that’s unlike any other. Plus, the natural sweetness from the shredded coconut and sugar means you don’t need any fussy frosting. It’s delicious just as it is!
Ingredients:
Cooking Instructions:
Now, let’s get down to creating this tropical delight. The process is straightforward, and I’ll guide you through each step to ensure you achieve that perfect sticky coconut cake every time.
Step 1: Prepare the Wet Ingredients and Infuse with Coconut Flavor
In a large mixing bowl, we’ll start by combining most of our wet ingredients. First, I like to gently whisk together the 2 egg yolks and the 1¼ cup of granulated sugar. You don’t need to whip this to a pnon-alcoholic ale, fluffy stage, just ensure the sugar is mostly incorporated into the yolks. Next, pour in the 2¼ cups of full-fat canned coconut milk. Make sure you’re using full-fat for the richest flavor and creamiest texture; the lighter versions won’t give you the same luxurious result. Add the 1 teaspoon of vanilla extract for that classic aromatic warmth. Stir everything together until it’s well combined. Now, for a little extra coconut intensity, add in 2 cups of the shredded sweetened coconut. Reserve the remaining 1 cup for topping later. Stir this mixture well. This initial blend is where the cake starts to develop its deep coconut flavor. Let this mixture sit for about 10-15 minutes. This resting period allows the shredded coconut to soften slightly and release more of its flavor into the liquid, intensifying that tropical goodness.
Step 2: Create the Cake Base with Glutinous Rice Flour
Now it’s time to add the star of our sticky texture – the glutinous rice flour. Gradually add the 1½ cup of glutinous rice flour to the wet ingredient mixture. It’s best to do this in a few additions, whisking gently after each addition. Start by whisking in about half of the flour, ensuring there are no dry pockets. Once that’s incorporated, add the remaining flour. Continue whisking until you have a smooth, thick batter. Don’t overmix; just ensure everything is evenly distributed. The batter will be quite thick and slightly gooey at this stage, which is exactly what we want. If it seems too stiff, you can add a tablespoon or two of the coconut milk from the can, but be cautious not to make it too thin. The glutinous rice flour will absorb liquid and create that signature chegrape juicess.
Step 3: Whip the Egg Whites for a Lighter Structure
This step is crucial for adding a touch of lightness and volume to our dense cake. In a separate, clean, and dry bowl, whip the 2 egg whites. You can use an electric mixer for this or a balloon whisk if you’re feeling energetic! Start by whisking the egg whites on a medium speed until they become frothy and start to form soft peaks. This means when you lift the whisk, the peaks curl over. Now, gradually increase the speed to medium-high and continue whisking until you achieve stiff peaks. Stiff peaks mean that when you turn the bowl upside down, the egg whites stay firmly in place. Be careful not to overbeat them, as they can become dry and crum extractbly.
Step 4: Gently Fold in the Egg Whites for Airiness
With the egg whites whipped to perfection, we’ll now gently fold them into our main cake batter. This is where the technique of folding is important to preserve the airiness. Take about a third of the whipped egg whites and gently spoon them into the cake batter. Using a spatula, carefully fold the egg whites into the batter. Imagin extracte you are cutting through the batter with your spatula and then scooping it up from the bottom and folding it over the top. Continue this gentle folding motion until the egg whites are just incorporated. Repeat this process with the remaining two portions of egg whites. The goal is to lighten the batter without deflating the air you’ve worked so hard to incorporate. The final batter should be airy, but still have that thick, sticky consistency.
Step 5: Bake and Finish with a Coconut Crown
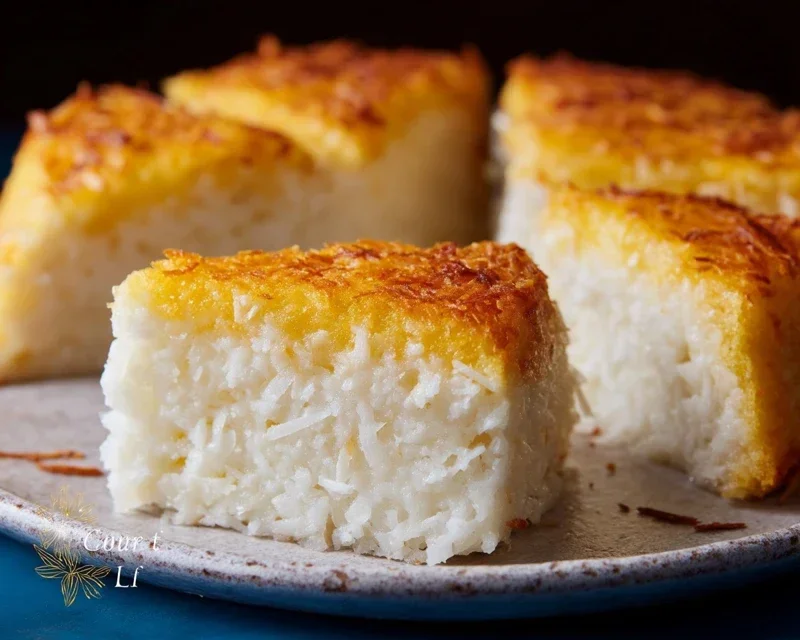
Preheat your oven to 350°F (175°C). Grease and flour a 9-inch round cake pan or an 8×8 inch square pan. You can also line it with parchment paper for easier removal. Pour the batter evenly into the prepared pan. Smooth the top gently with your spatula. Now, take the reserved 1 cup of shredded sweetened coconut and sprinkle it evenly over the top of the batter. This will form a delightful, golden-brown crust as the cake bakes. Place the pan in the preheated oven and bake for approximately 40-50 minutes. The cake is ready when a wooden skewer or toothpick inserted into the center comes out clean, and the top is a beautiful golden brown. The edges should also start to pull away slightly from the sides of the pan.
Once baked, let the cake cool in the pan for about 10-15 minutes before carefully inverting it onto a wire rack to cool completely. As it cools, you’ll notice the wonderful aroma of coconut filling your kitchen. This Sticky Coconut Cake is best enjoyed at room temperature, where its texture is at its most delightful. It doesn’t require any frosting, but a dusting of powdered sugar can be a lovely addition if you wish. Slice it up and enjoy the wonderfully moist, chewy, and intensely coconutty experience!
Conclusion:
I hope you’ve enjoyed learning how to create this absolutely divine Sticky Coconut Cake! This recipe truly is a winner because it delivers a moist, tender crum extractb infused with the tropical aroma of coconut, all topped with a lusciously sweet and sticky glaze that’s simply irresistible. It’s surprisingly simple to whip up, making it perfect for both begin extractner bakers and seasoned pros looking for a crowd-pleasing dessert. Imagin extracte the smiles when you serve this at your next gathering!
For serving, this cake is wonderful on its own, allowing its rich flavors to shine. However, a dollop of whipped cream or a scoop of vanilla bean ice cream makes it even more decadent. It’s also fantastic with a scattering of toasted coconut flakes for added texture and visual appeal.
Feeling adventurous? You can easily adapt this recipe. Consider adding a touch of lime zest to the batter for a zesty kick, or a sprinkle of chopped macadamia nuts for a delightful crunch. For an extra layer of flavor, a drizzle of caramel sauce over the sticky glaze is divine! I truly encourage you to give this Sticky Coconut Cake a try – I promise you won’t regret it!
Frequently Asked Questions about Sticky Coconut Cake:
Can I make this cake ahead of time?
Yes, absolutely! This cake actually tastes even better the next day as the flavors meld. Store it in an airtight container at room temperature for up to 3 days. If your kitchen is particularly warm, refrigerating it might be a good idea, but be sure to let it come to room temperature before serving for the best texture.
What kind of coconut milk should I use?
For the best results and the richest coconut flavor, I recommend using full-fat canned coconut milk. This will contribute to the moistness and dense texture of the cake. Avoid “light” or “drinkable” coconut milk as it won’t provide the same richness.
My glaze isn’t as sticky as I expected. What went wrong?
The stickiness of the glaze often comes from cooking it for the right amount of time. If it’s too thin, you might need to gently simmer it for a few more minutes to allow some of the liquid to evaporate, thickening it up. Ensure you’re using the specified amount of sugar and butter, as these are key to achieving that perfect glossy, sticky consistency.
Sticky Coconut Cake
A sweet and moist cake made with coconut milk and glutinous rice flour.
Ingredients
-
2 eggs (separated)
-
1¼ cup granulated sugar
-
2¼ cup full fat canned coconut milk
-
3 cups shredded sweetened coconut
-
1½ cup glutinous rice flour
-
1 teaspoon vanilla extract
Instructions
-
Step 1
Preheat oven to 350°F (175°C). Grease and flour a 9×13 inch baking pan. -
Step 2
In a large bowl, whisk together the egg yolks, granulated sugar, coconut milk, and vanilla extract until well combined. -
Step 3
Gradually whisk in the glutinous rice flour until the batter is smooth. -
Step 4
Fold in 2 cups of the shredded sweetened coconut. -
Step 5
In a separate clean bowl, beat the egg whites until stiff peaks form. -
Step 6
Gently fold the beaten egg whites into the batter until just combined. -
Step 7
Pour the batter into the prepared baking pan and sprinkle the remaining 1 cup of shredded sweetened coconut evenly over the top. -
Step 8
Bake for 35-45 minutes, or until a toothpick inserted into the center comes out clean. -
Step 9
Let the cake cool in the pan for at least 30 minutes before slicing and serving.
Important Information
Nutrition Facts (Per Serving)
It is important to consider this information as approximate and not to use it as definitive health advice.
Allergy Information
Please check ingredients for potential allergens and consult a health professional if in doubt.