Sweet Potato Tortillas – Gluten-Free Vegan Wraps
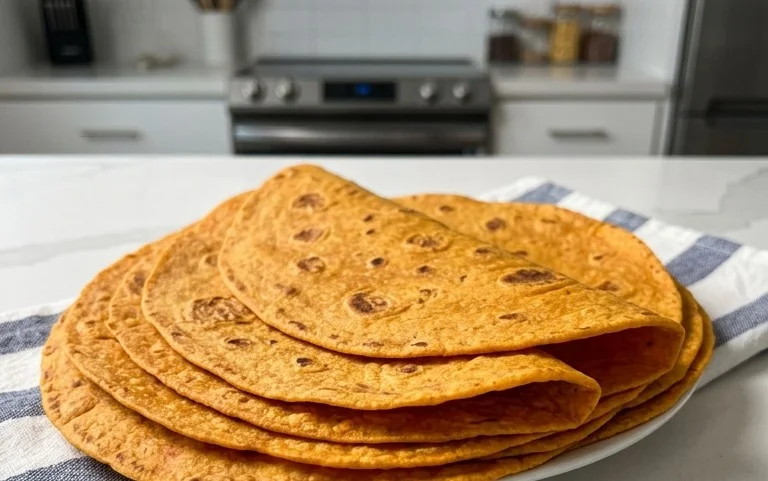
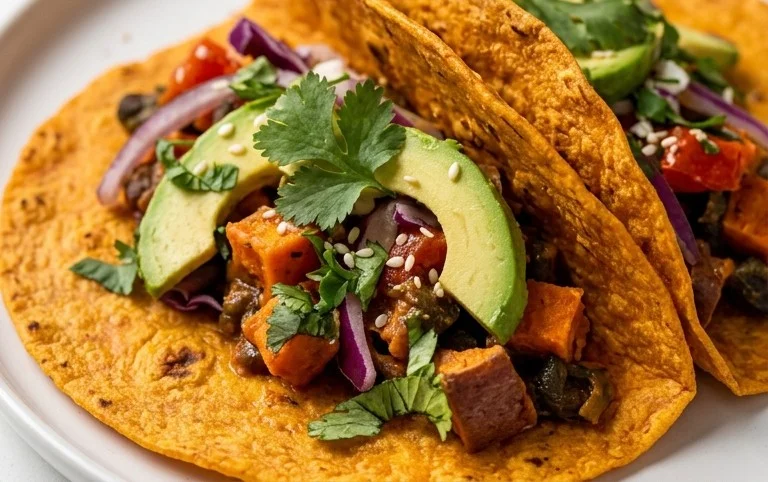
Sweet Potato Tortillas (Gluten-Free Vegan Wraps) are about to revolutionize your lunch game! Forget bland, crum extractbly gluten-free options; these vibrant, naturally sweet tortillas are a game-changer. I’ve always been on the hunt for versatile wraps that tick all the boxes: delicious, healthy, and accommodating for various dietary needs. That’s precisely why these sweet potato tortillas have become a staple in my kitchen. The beautiful orange hue isn’t just for show; it comes from the pureed sweet potato, which infuses the wraps with a subtle, earthy sweetness that pairs wonderfully with both savory and sweet fillings. What truly makes these sweet potato tortillas special is their incredible pliability and soft texture, allowing you to load them up without fear of tearing. They’re the perfect canvas for your favorite taco fillings, veggie scrambles, or even a simple spread of hummus and greens. Get ready to discover your new favorite way to wrap!
Sweet Potato Tortillas (Gluten-Free Vegan Wraps)
Are you on the hunt for a delicious, healthy, and versatile wrap that caters to gluten-free and vegan diets? Look no further! These Sweet Potato Tortillas are a game-changer. They’re soft, pliable, packed with subtle sweetness from the sweet potatoes, and incredibly satisfying. Unlike many store-bought gluten-free wraps that can be dry and crum extractbly, these homemade gems are designed to hold together beautifully, whether you’re filling them with your favorite vegan taco fillings, breakfast scrambles, or simply spreading some hummus and veggies. The natural vibrant color of the sweet potato also makes them a feast for the eyes!
Let’s get started on these fantastic wraps that will elevate your meal prep and everyday eating.
Ingredients:
Detailed Instructions
To begin extract making these wonderful sweet potato tortillas, the first crucial step involves preparing your sweet potatoes. You’ll want to ensure they are cooked until they are exceptionally tender, almost falling apart. Steaming or boiling is the best method here, and it’s vital that you drain them thoroughly and mash them until they are completely smooth. Any excess moisture can affect the final texture of your tortillas, making them sticky or difficult to handle. Aim for a consistency similar to mashed potatoes, ensuring no lumps remain. This smooth base is key to achieving pliable wraps.
Next, in a medium-sized mixing bowl, combine your mashed sweet potatoes with the vegan butter. If you’re using oil, add that instead. Gently mash and stir these together until the butter is fully incorporated into the sweet potato. This creates a rich and moist foundation for our dough.
Now it’s time to introduce the flavor enhancers. Add the sea salt, black pepper, onion powder, and garlic powder to the sweet potato and butter mixture. Stir everything together thoroughly. These seasonings will infuse the tortillas with a savory depth that perfectly complements the natural sweetness of the potatoes.
In a separate small bowl, whisk together the psyllium husk with 1 tablespoon of hot water. Let this mixture sit for about 5-10 minutes. You’ll notice it will form a gel-like consistency. This psyllium gel is an absolute lifesaver for gluten-free baking, as it acts as a binder and adds elasticity, mimicking the role of gluten. It’s what will help your tortillas hold together without cracking.
Add your active gluten-free sourdough starter to the sweet potato mixture. If you don’t have sourdough starter, don’t fret! You can substitute it with an equal amount of water and an extra 1/2 teaspoon of baking powder and a teaspoon of apple cider vinegar to give it a little lift, or simply increase the amount of hot water slightly if the dough seems too dry later. Then, add the psyllium husk gel to the bowl. Mix everything together well.
Gradually add the arrowroot flour, starting with 2 tablespoons. If you’re using the optional baking powder, add it now as well. Mix until just combined. The dough should start to come together. If the dough feels too dry and isn’t forming a cohesive ball, add the remaining tablespoon of arrowroot flour or, if it’s still too stiff, add the second tablespoon of hot water, a teaspoon at a time, until you achieve a soft, pliable dough that’s not overly sticky. You want it to be manageable, similar to a soft playdough.
Once your dough is ready, it’s time to shape the tortillas. Lightly dust your work surface with a little extra arrowroot flour or gluten-free flour of your choice. Divide the dough into 4-6 equal portions, depending on how large you want your tortillas to be. Roll each portion into a ball.
Now, you have a couple of options for shaping. You can either use a tortilla press with parchment paper on either side of the dough ball, pressing it down firmly and evenly to create a thin, round tortilla. Alternatively, you can gently roll out each ball of dough with a rolling pin on your lightly floured surface until it’s about 6-8 inches in diameter and about 1/8 inch thick. Work from the center outwards, rotating the dough occasionally to ensure an even thickness. Be gentle; these gluten-free doughs can be a bit more delicate. If the edges crack slightly, you can just press them back together with your fingers.
Finally, it’s time to cook your sweet potato tortillas. Heat a lightly oiled skillet or griddle over medium heat. Once the pan is hot, carefully place one tortilla onto the surface. Cook for 2-3 minutes per side, or until golden brown spots begin extract to appear and the tortilla is cooked through. You might see some slight puffing, especially if you added baking powder. Don’t overcook them, as this can make them brittle. Repeat this process with the remaining tortillas, adding a tiny bit more oil to the pan if needed between batches. As each tortilla finishes cooking, stack them on a plate and cover them loosely with a clean kitchen towel. This will help them stay warm and soft, allowing the steam to gently soften them further, ensuring they remain pliable for your culinary creations. Enjoy your homemade, healthy, and delicious gluten-free vegan wraps!
Conclusion:
I hope you’re as excited as I am to dive into making these delicious Sweet Potato Tortillas! These gluten-free vegan wraps are a game-changer for anyone looking for a healthy, flavorful, and incredibly versatile alternative to traditional tortillas. Their natural sweetness from the sweet potato, combined with a tender texture, makes them perfect for a wide range of meals. They’re surprisingly easy to prepare, making them an ideal weeknight addition or a fun weekend cooking project.
Think beyond just wraps! These sweet potato tortillas are fantastic as a base for mini pizzas, folded into quesadillas, or even served as a side dish alongside your favorite chili or curry. For variations, feel free to experiment with adding a pinch of smoked paprika or a touch of chili powder to the dough for a smoky or spicy kick. You could also swap out the sweet potato for butternut squash for a slightly different flavor profile. I truly encourage you to give these sweet potato tortillas a try – you won’t be disappointed!
Frequently Asked Questions:
Q: How long do these sweet potato tortillas last?
A: Stored properly in an airtight container in the refrigerator, these sweet potato tortillas will stay fresh for about 3-4 days. For longer storage, you can cool them completely, stack them with parchment paper in between, and freeze them for up to 2-3 months. Simply thaw them at room temperature or gently reheat them before serving.
Q: Can I use regular flour instead of gluten-free flour?
A: While the recipe is designed for gluten-free flour to cater to specific dietary needs, you could technically use all-purpose wheat flour. However, the texture and binding properties might change slightly, and they would no longer be gluten-free. The gluten-free flour blend used here is key to achieving the desired tender yet pliable outcome for these wraps.
Sweet Potato Tortillas (Gluten-Free Vegan Wraps)
Delicious and healthy gluten-free vegan wraps made with sweet potato and sourdough starter.
Ingredients
-
2 small sweet potatoes – steamed or boiled (no liquid / mashed)
-
2 tbsp vegan butter
-
1-2 tbsp hot water
-
3/4 tsp sea salt
-
dash black pepper
-
1/2 tsp onion powder
-
1/2 tsp garlic powder
-
3/4 cup gluten free sourdough starter
-
2 tsp psyllium husk
-
2-3 tbsp arrowroot flour
-
1/2 tsp baking powder
Instructions
-
Step 1
Mash the steamed or boiled sweet potatoes until smooth. Ensure no liquid remains. -
Step 2
In a bowl, combine the mashed sweet potato with vegan butter (or oil), hot water, sea salt, black pepper, onion powder, and garlic powder. Mix well. -
Step 3
Stir in the gluten-free sourdough starter and psyllium husk until combined. -
Step 4
Gradually add the arrowroot flour, 1 tablespoon at a time, mixing until a soft dough forms. Add baking powder if using for puffier tortillas. -
Step 5
Knead the dough on a lightly floured surface for a few minutes until smooth. Divide into 6-8 equal portions and roll into balls. -
Step 6
On a lightly floured surface, roll out each ball into a thin circle (tortilla shape). -
Step 7
Heat a lightly oiled skillet or griddle over medium heat. Cook each tortilla for 2-3 minutes per side, until lightly golden and cooked through.
Important Information
Nutrition Facts (Per Serving)
It is important to consider this information as approximate and not to use it as definitive health advice.
Allergy Information
Please check ingredients for potential allergens and consult a health professional if in doubt.