No-Bake Cookie Dough Cheesecake-Easy Dessert
No Bake Cookie Dough Cheesecake is the ultimate indulgence for anyone who dreams of raw cookie dough and creamy cheesecake. Seriously, what’s not to love? We’re talking about a decadent, no-bake dessert that captures the irresistible flavors of chocolate chip cookie dough perfectly nestled within a smooth, luscious cheesecake. This isn’t just any dessert; it’s a celebration of childhood favorites transformed into an elegant treat. The magic of this No Bake Cookie Dough Cheesecake lies in its simplicity and its ability to deliver maximum flavor with minimal effort. Imagin extracte biting into a slice: the delightful chegrape juicess of the cookie dough interspersed with the cool, rich cheesecake filling. It’s a textural and taste sensation that’s guaranteed to impress, and the best part is you don’t even need to turn on the oven! Get ready to discover your new go-to dessert.
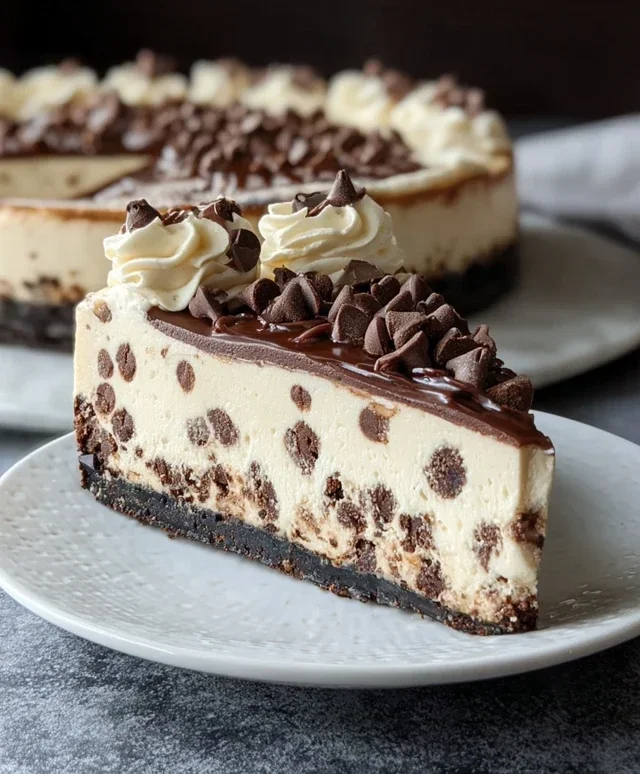
No Bake Cookie Dough Cheesecake
Get ready to indulge in pure dessert bliss with this No-Bake Cookie Dough Cheesecake. Imagin extracte a velvety smooth cheesecake filling, swirled with edible cookie dough, all nestled on a buttery cookie crust. The best part? No oven required! This recipe is perfect for those hot summer days when you want a show-stopping dessert without turning on the heat, or for any time you crave a seriously decadent treat that’s surprisingly easy to whip up.
The magic of this cheesecake lies in its layers of flavor and texture. The cookie crust provides a delightful crunch, giving way to the creamy, luscious cheesecake. Then come the little bursts of chewy, sweet cookie dough throughout, adding an irresistible playful element. It’s a combination that’s truly hard to beat.
Let’s dive into what you’ll need to create this masterpiece.
Ingredients:
Creating the Cookie Crust
This no-bake cheesecake starts with a foundation that’s as delicious as it is simple. We’re going to make a pressed cookie crust that’s firm enough to hold our creamy filling without any baking.
1. In a medium bowl, combine the 1 ¾ cups all-purpose flour, ¾ cup packed light brown sugar, ½ cup granulated sugar, and ¼ teaspoon salt. Whisk these dry ingredients together until they are well combined. This ensures that the sugars and salt are evenly distributed, which will lead to a more consistent flavor in your crust.
2. Next, add the 1 cup of softened unsalted butter to the dry ingredients. Using a pastry blender, a fork, or even clean hands, work the butter into the dry ingredients until the mixture resembles coarse crum extractbs. You want to achieve a texture that’s similar to wet sand, where the butter coats the flour particles. It’s important that the butter is softened but not melted, as this will help create the right texture for the pressed crust.
3. Now, it’s time to add the binder and flavor! Stir in 2 tablespoons of cold heavy cream and 1 ½ teaspoons of vanilla extract. Mix everything together until the dough just starts to come together. Be careful not to overmix at this stage. The dough will be slightly crum extractbly, but it should hold together when you squeeze it in your hand. This is exactly what we want for a good pressed crust.
4. Press this cookie dough mixture evenly into the bottom of a 9-inch springform pan. I like to use the bottom of a measuring cup or a flat-bottomed glass to get a nice, even, and compact layer. Take your time here, ensuring the crust goes all the way to the edges of the pan. Once pressed, place the pan in the freezer for at least 15-20 minutes while you prepare the cheesecake filling. This chilling step is crucial for helping the crust firm up, making it easier to slice later.
Whipping Up the Creamy Cheesecake Filling
This is where the real magic happens – a luxuriously smooth and decadent cheesecake filling that is completely no-bake.
1. In a large bowl, beat the 24 ounces of softened cream cheese with an electric mixer on medium speed until it’s completely smooth and creamy, with no lumps. This is a critical step for achieving a silky-smooth texture in your cheesecake. Ensure your cream cheese is truly softened to room temperature; if it’s still cold, you’ll end up with a lumpy filling, no matter how much you beat it. Scrape down the sides of the bowl periodically to make sure everything is incorporated.
2. Gradually add 1 cup of the sifted powdered sugar to the cream cheese mixture and beat on low speed until just combined. Then, increase the speed to medium and beat until the mixture is smooth and well combined. Sifting the powdered sugar is important to prevent any lumps from forming in your filling, leading to an even smoother texture.
3. Add the remaining 1 ½ teaspoons of vanilla extract to the cream cheese mixture and beat until incorporated.
4. In a separate, large, chilled bowl, pour in 1 ¼ cups of very cold heavy cream. Add the remaining ½ cup of sifted powdered sugar to the heavy cream. Using your electric mixer, beat the heavy cream on medium-high speed until stiff peaks form. Stiff peaks mean that when you lift the beaters, the cream stands up straight and doesn’t flop over. Be careful not to overbeat, or you’ll end up with butter!
5. Gently fold the whipped cream into the cream cheese mixture. Start by adding about a third of the whipped cream to the cream cheese mixture and gently fold it in with a spatula. This lightens the cream cheese mixture and makes it easier to incorporate the rest of the whipped cream without deflating it. Once partially combined, add the remaining whipped cream and continue to gently fold until just combined and no streaks of cream cheese remain. Avoid overmixing, as this can deflate the whipped cream and result in a less airy cheesecake.
6. Now, it’s time for the star of the show: the cookie dough! Gently fold in 1 ¼ cups of mini semi-sweet chocolate chips and your 10 edible cookie dough balls into the cheesecake filling. You want to distribute them evenly throughout the filling, but be careful not to overmix, as this can break down the cookie dough balls too much. The goal is to have distinct pockets of cookie dough.
7. Spoon the cheesecake filling over the chilled cookie crust in the springform pan. Spread the filling evenly using an offset spatula or the back of a spoon.
Finishing Touches and Chill Time
The final steps bring it all together for a stunning presentation.
1. Gently spread the 8 ounces of whipped topping (or your prepared stabilized whipped cream) over the top of the cheesecake filling, creating a smooth and even layer.
2. Sprinkle the remaining 2 tablespoons of mini semi-sweet chocolate chips over the whipped topping for an extra touch of chocolatey goodness and visual appeal.
3. Cover the springform pan loosely with plastic wrap, ensuring the plastic wrap doesn’t touch the whipped topping if possible. Refrigerate the cheesecake for at least 6-8 hours, or preferably overnight, to allow it to set completely. This chilling time is essential for the cheesecake to firm up and develop its signature creamy texture. A longer chill time will result in a firmer, easier-to-slice cheesecake.
Once chilled, carefully run a knife around the edge of the pan before releasing the springform sides. Slice and enjoy your incredible No-Bake Cookie Dough Cheesecake!
Conclusion:
And there you have it – your guide to creating a show-stopping No Bake Cookie Dough Cheesecake! This recipe is truly a winner because it delivers all the decadent flavors of traditional cheesecake and classic cookie dough without the fuss of baking. It’s incredibly forgiving, remarkably quick to assemble, and consistently impresses everyone who tries it. The creamy, dreamy cheesecake filling paired with the irresistible chunks of edible cookie dough creates a flavor and texture sensation that’s simply out of this world. It’s the perfect dessert for any occasion, from casual gatherings to more formal celebrations.
I highly encourage you to give this No Bake Cookie Dough Cheesecake a try! Whether you’re a seasoned baker or a complete begin extractner, you’ll be amazed at how easy and rewarding it is. Get creative with your toppings – a drizzle of chocolate ganache, a scattering of mini chocolate chips, or even some fresh berries can elevate it even further. Don’t be afraid to experiment with different types of cookie dough, too!
Frequently Asked Questions:
Can I make this No Bake Cookie Dough Cheesecake ahead of time?
Absolutely! This cheesecake is perfect for making ahead. I usually prepare it the day before serving. This allows the flavors to meld beautifully and the cheesecake to set up perfectly in the refrigerator. Just cover it tightly with plastic wrap and keep it chilled until you’re ready to enjoy.
What if I’m worried about eating raw cookie dough?
I understand your concern! The cookie dough used in this recipe is specifically designed to be edible raw. It contains no raw eggs and uses heat-treated flour. This ensures that you can safely enjoy those delicious cookie dough bites without any worries. If you’re still hesitant, you can opt for a store-bought edible cookie dough, or you can briefly bake your homemade cookie dough before crum extractbling it into the cheesecake.
Are there any other flavor variations I can try?
The possibilities are endless! You could swap out the chocolate chip cookie dough for peanut butter cookie dough, or even a double chocolate cookie dough. For an extra layer of flavor, consider adding a tablespoon of instant coffee granules to the cheesecake filling for a mocha twist, or swirl in some caramel sauce before chilling. Enjoy experimenting!
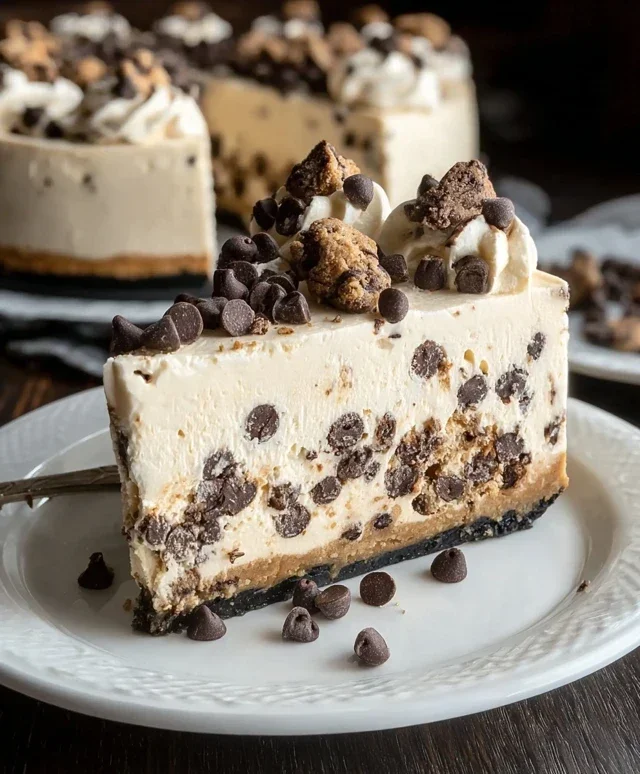
No Bake Cookie Dough Cheesecake
A decadent no-bake cheesecake featuring a cookie dough crust and creamy filling, topped with more cookie dough.
Ingredients
-
1 ¾ cups all-purpose flour
-
1 cup unsalted butter, softened
-
¾ cup light brown sugar, packed
-
½ cup granulated sugar
-
2 tablespoons heavy cream, cold
-
1 ½ teaspoons vanilla extract
-
¼ teaspoon salt
-
1 ¼ cups mini semi-sweet chocolate chips
-
24 ounces cream cheese, softened
-
1 ½ cups powdered sugar, sifted, divided
-
1 ¼ cups heavy cream, very cold
-
8 ounces whipped topping
-
2 tablespoons mini semi-sweet chocolate chips
-
10 edible cookie dough balls
Instructions
-
Step 1
Prepare the crust: In a bowl, combine the flour, softened butter, brown sugar, granulated sugar, and salt. Mix until well combined. Stir in 1 ¼ cups mini semi-sweet chocolate chips. Press this mixture into the bottom of a 9-inch springform pan. -
Step 2
Make the cheesecake filling: In a large bowl, beat the softened cream cheese until smooth. Gradually add 1 cup of the sifted powdered sugar and 1 teaspoon of the vanilla extract, beating until combined and smooth. -
Step 3
In a separate bowl, whip the 1 ¼ cups of very cold heavy cream until stiff peaks form. Gently fold the whipped cream into the cream cheese mixture until just combined. -
Step 4
Fold in the 8 ounces of whipped topping and the remaining ½ teaspoon of vanilla extract into the cream cheese mixture. Then, gently fold in the 2 tablespoons of mini semi-sweet chocolate chips. -
Step 5
Pour the cheesecake filling over the prepared crust and spread evenly. Arrange the 10 edible cookie dough balls on top of the cheesecake filling. -
Step 6
Cover and refrigerate for at least 4-6 hours, or until firm. Serve chilled.
Important Information
Nutrition Facts (Per Serving)
It is important to consider this information as approximate and not to use it as definitive health advice.
Allergy Information
Please check ingredients for potential allergens and consult a health professional if in doubt.