Easy Homemade Fruit Leather Recipe – Healthy Snack
Homemade fruit leather recipes are a gateway to a world of vibrant, chewy, and utterly delicious snacks that will transport you back to childhood memories. Forget those store-bought versions packed with artificial colors and questionable ingredients; crafting your own fruit leather is surprisingly simple and incredibly rewarding. What is it about fruit leather that captures our hearts and taste buds? It’s that perfect balance of sweet and tart, that satisfying chew, and the pure, unadulterated flavor of real fruit. It’s a fantastic way to use up seasonal produce, a healthy alternative for fussy eaters, and a delightful treat for any occasion. This homemade fruit leather recipe is special because it allows you to control every ingredient, ensuring a natural, wholesome snack that’s bursting with flavor. We’re about to unlock the secrets to creating this delightful treat right in your own kitchen!
Why You’ll Love This Recipe:
A burst of pure fruit flavor.
A healthy and fun snack for all ages.
Endless customization with your favorite fruits.
Homemade Fruit Leather Recipe
There’s something incredibly satisfying about making your own fruit leather. It’s a delightful way to preserve the vibrant flavors of fresh fruit, and the process is surprisingly simple and rewarding. Forget those store-bought versions packed with artificial flavors and preservatives; our homemade fruit leather is bursting with pure, natural goodness. It’s the perfect healthy snack for kids and adults alike, a delightful treat for lunchboxes, or even a fun, chewy topping for yogurt and ice cream. Plus, it’s a fantastic way to use up any slightly overripe fruit you might have hangin extractg around.
Ingredients:
Instructions:
The beauty of fruit leather lies in its simplicity. It primarily requires fruit, a touch of sweetness, and a little bit of patience as it dries. Let’s get started on this delicious adventure!
1. Preparing Your Fruit:
The first step is to prepare your chosen fruit. You’ll need about 2 cups of chopped fruit. I love using a mix of berries like strawberries and blueberries for a vibrant color and sweet-tart flavor. Peaches and mangoes also create a wonderfully smooth and tropical leather. If you’re using apples, I recommend peeling and coring them before chopping. For softer fruits like berries and ripe peaches, you can leave the skin on if you prefer, but make sure to remove any large pits. Chop your fruit into roughly uniform pieces to ensure even cooking. Don’t worry about perfect cuts; it will all be pureed later.
2. Cooking Down the Fruit:
Once your fruit is chopped, it’s time to soften it and release its natural juices. Place the chopped fruit in a saucepan over medium heat. You want to bring it to a gentle simmer, stirring occasionally. As the fruit heats up, it will begin extract to break down and release its liquid. This process can take anywhere from 10 to 15 minutes, depending on the type of fruit you’re using. If your fruit seems particularly dry, you can add a tablespoon or two of water to get things started, but usually, the fruit’s own moisture is enough. We’re aiming for a consistency where the fruit is tender and starting to break apart easily. This is where the magic begin extracts, concentrating the fruit’s flavor.
3. Sweetening and Brightening the Flavor:
Once the fruit has softened beautifully, it’s time to add the sugar and lemon juice. Stir in the 3 tablespoons of white sugar. The amount of sugar can be adjusted to your preference and the sweetness of your fruit. If your fruit is very ripe and sweet, you might even get away with slightly less. The lemon juice is crucial here; it not only adds a lovely bright tang that balances the sweetness but also acts as a natural preservative, helping your fruit leather last longer and preventing it from browning too quickly. Stir everything together until the sugar is completely dissolved and the mixture is fragrant and inviting.
4. Pureeing for Smoothness:
Now, we need to transform our cooked fruit into a smooth, spreadable puree. You have a couple of options here. For a super smooth texture, I highly recommend using an immersion blender directly in the saucepan. Be careful as the mixture will be hot! Blend until there are no more chunks and you have a velvety smooth consistency. Alternatively, you can carefully transfer the mixture to a regular blender or food processor and blend until smooth. If you prefer a slightly more textured fruit leather, you can leave some very small pieces of fruit, but generally, a smooth puree yields the best results for even drying.
5. Spreading and Drying:
This is where the patience comes in. Preheat your oven to its lowest setting, ideally around 170°F (75°C). Line a baking sheet with parchment paper or a silicone baking mat, ensuring it’s completely covered. Pour your fruit puree onto the prepared baking sheet. Using a spatula, spread the puree into a thin, even layer, about 1/8 to 1/4 inch thick. Try to get the edges as smooth as the center for uniform drying. If you have two baking sheets, you can prepare them both to maximize efficiency. Place the baking sheet(s) in the preheated oven. You will need to dry the fruit leather for several hours. The exact drying time will vary depending on your oven, the thickness of your puree, and the humidity in your kitchen. I typically find it takes anywhere from 4 to 8 hours. Check on it periodically, and when the fruit leather is no longer sticky to the touch and peels easily from the parchment paper, it’s ready. It should be pliable but not wet.
6. Cooling and Storing:
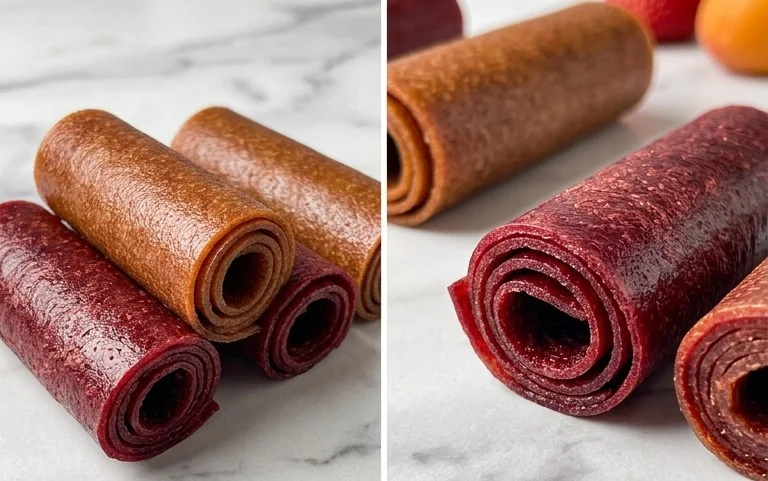
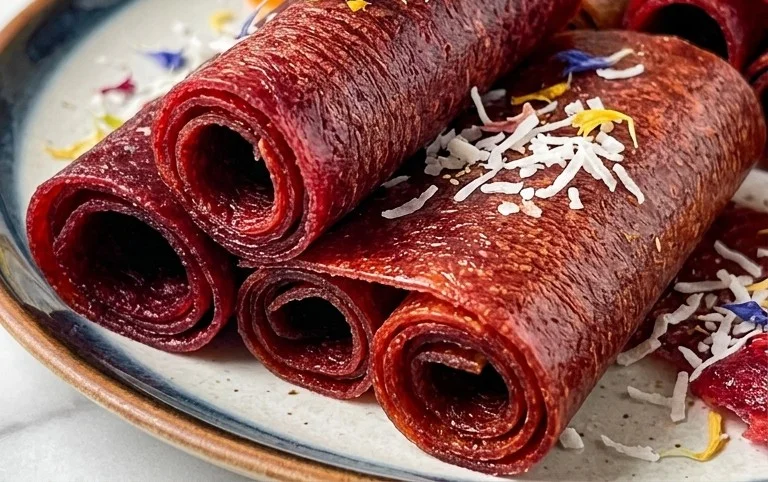
Once your fruit leather is fully dried, carefully remove the baking sheet from the oven. Let the fruit leather cool completely on the baking sheet. This is important for preventing it from sticking to itself. Once it’s cool, you can peel it off the parchment paper in one large sheet. To store it, you can roll it up tightly. You can either leave it as one large roll or cut it into strips or squares for individual portions. Wrap each roll or piece tightly in plastic wrap or place them in an airtight container. Homemade fruit leather can be stored at room temperature for a couple of weeks, or in the refrigerator for even longer. Enjoy this delightful, healthy treat!
Conclusion:
Making your own homemade fruit leather is an incredibly rewarding and surprisingly simple culinary adventure! The beauty of this recipe lies in its versatility and the pure, unadulterated flavor of fresh fruit. You get to control exactly what goes in, avoiding all those artificial colors and preservatives found in store-bought versions. It’s a fantastic way to use up a bounty of ripe produce, and the end result is a chewy, delightful treat that’s perfect for snacking, lunchboxes, or even as a healthier alternative to candy. I truly encourage you to give this homemade fruit leather recipe a try – you might be amazed at how easy and delicious it is!
For serving, fruit leather is wonderful on its own as a satisfying snack. It also pairs beautifully with a cheese board or yogurt. Think about rolling it up into fun shapes for kids or cutting it into strips for a more refined presentation. When it comes to variations, the possibilities are endless! You can stick to single fruits like strawberries or mangoes, or get creative with combinations such as apple-cinnamon, peach-raspberry, or even a tropical blend of pineapple and banana. Don’t be afraid to experiment with a pinch of spice like gin extractger or a squeeze of lemon for an extra zing!
FAQs:
Why is my fruit leather not drying properly?
This can happen for a few reasons. Ensure your oven is set to the lowest possible temperature (around 140-170°F or 60-75°C) and that you are allowing enough time for drying. Humidity in your kitchen can also play a role; you might need to extend the drying time. Make sure your fruit puree isn’t too thick; a thinner consistency will dry faster and more evenly.
Can I make fruit leather without an oven?
Absolutely! While the oven is the most common method, you can also use a dehydrator. Follow your dehydrator’s instructions for fruit leather, typically setting it to around 135°F (57°C) until leathery and pliable. In warmer, drier climates, you might even be able to sun-dry your fruit leather, but this requires very specific conditions and careful monitoring for insects and spoilage.
How long will homemade fruit leather last?
When stored properly, your delicious homemade fruit leather can last for several weeks. Once completely cooled and dried, wrap it tightly in plastic wrap or parchment paper and store it in an airtight container at room temperature. If you live in a very humid environment, or if you’re concerned about longevity, refrigeration can extend its shelf life even further, though it might become a bit firmer.
Homemade Fruit Leather Recipe
A simple and delicious recipe for homemade fruit leather using fresh fruit and a touch of sugar and lemon.
Ingredients
-
2 cups fruit, chopped
-
3 tbsp white sugar
-
½ whole lemon, just the juice
-
1/4 tsp cinnamon
-
Pinch of salt
-
1 tsp vanilla extract
Instructions
-
Step 1
Wash and chop your fruit into small pieces. Remove any seeds or pits. -
Step 2
Combine the chopped fruit, white sugar, and lemon juice in a blender or food processor. -
Step 3
Blend until completely smooth. Add cinnamon, salt, and vanilla extract, and blend again briefly to combine. -
Step 4
Pour the mixture onto a parchment-lined baking sheet, spreading it thinly and evenly. Aim for about 1/8 to 1/4 inch thickness. -
Step 5
Bake in a preheated oven at 170°F (77°C) for 3-4 hours, or until the fruit leather is no longer sticky to the touch. -
Step 6
Let it cool completely on the baking sheet, then peel it off and cut into strips.
Important Information
Nutrition Facts (Per Serving)
It is important to consider this information as approximate and not to use it as definitive health advice.
Allergy Information
Please check ingredients for potential allergens and consult a health professional if in doubt.