Dairy Free Pesto Recipe – Easy & Delicious
Dairy Free Pesto is a revelation, transforming a beloved Italian classic into a vibrant, allergen-friendly delight. If you’ve ever craved that intensely fresh, herbaceous flavor but have to steer clear of dairy, then this is the recipe you’ve been waiting for. We all adore traditional pesto for its incredible versatility – slathered on pasta, swirled into dips, or as a zesty marinade – and this dairy free pesto captures all that magic, and then some. What makes this particular version so special? It’s the ingenious way we achieve that rich, creamy texture without a speck of cheese. Prepare to be amazed by the simple yet powerful ingredients that come together to create a pesto that’s not just a substitute, but a star in its own right.
Get ready to elevate your meals!
Dairy Free Pesto
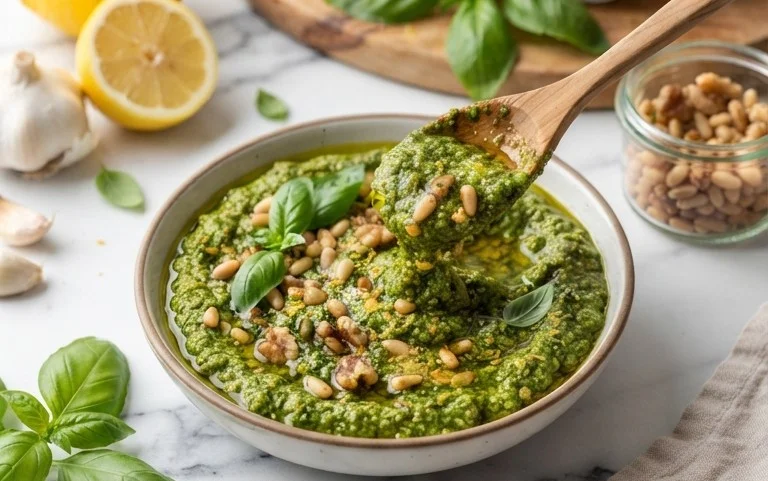
Creating a vibrant, flavorful pesto without dairy is not only possible, it’s incredibly rewarding! This recipe delivers all the classic basil and garlic punch you expect from pesto, with a creamy, cheesy depth that might just surprise you. Forget store-bought and embrace the fresh, homemade goodness. Perfect for pasta, as a spread on sandwiches, drizzled over roasted vegetables, or as a dip, this dairy-free pesto is a versatile kitchen staple you’ll reach for again and again.
The secret to its richness lies in a clever ingredient swap that provides that umami, slightly nutty flavor often associated with parmesan cheese. We’ll be using nutritional yeast, a deactivated yeast with a cheesy, savory taste, which is naturally dairy-free and packed with B vitamins. Don’t be intimidated if you haven’t used it before; it’s readily available in most health food stores and many larger supermarkets, and it’s a game-changer for dairy-free cooking.
Let’s get started!
Ingredients:
Preparing Your Pesto
Before we dive into blending, it’s essential to prepare your ingredients properly. This ensures the best texture and flavor for your dairy-free pesto.
1. Prepping the Basil:
Start with the star of the show: fresh basil. You’ll want to make sure your basil leaves are clean and dry. Gently wash them under cool running water and then pat them thoroughly dry with paper towels or use a salad spinner. Excess water can dilute the flavor of your pesto and affect its texture, making it watery instead of beautifully emulsified. Remove the larger stems, as they can sometimes impart a slightly bitter taste and create a less smooth pesto. You can use a mix of both large and small leaves; the smaller leaves tend to be more tender.
2. Toasting the Nuts (Optional but Recommended):
For an enhanced depth of flavor and a slightly richer texture, I highly recommend lightly toasting your pine nuts (or your chosen alternative like walnuts or pumpkin seeds). Place the nuts in a dry skillet over medium-low heat. Stir them frequently and watch them closely, as they can burn quickly. Toast for 3-5 minutes, or until they are fragrant and just starting to turn golden brown. This process brings out their natural oils and adds a wonderful nutty aroma to your pesto. Once toasted, remove them from the skillet immediately and let them cool completely before proceeding. If you’re short on time, you can skip this step, and your pesto will still be delicious.
3. Preparing the Garlic:
Peel your garlic cloves. You can give them a quick mince with a knife if you prefer, but since we’ll be processing everything in a food processor or blender, whole cloves will work just fine. If you’re sensitive to raw garlic, you can lightly roast the garlic cloves before adding them. To do this, toss them with a tiny bit of olive oil, wrap them in foil, and roast at 375°F (190°C) for about 15-20 minutes, until soft. Roasted garlic offers a mellower, sweeter garlic flavor.
Blending Your Dairy Free Pesto
Now for the fun part – transforming these fresh ingredients into a glorious green sauce!
4. Combining the Ingredients:
In the bowl of a food processor or a high-powered blender, add the fresh basil leaves, the toasted (or raw) pine nuts, the peeled garlic cloves, the salt, and the nutritional yeast (if using). Pulse a few times to break everything down into smaller pieces. This initial pulsing helps to create a good base for the oil to emulsify with. Don’t worry if it looks a bit dry at this stage; that’s perfectly normal.
5. Emulsifying with Olive Oil and Lemon:
With the food processor running (or on a medium speed in your blender), slowly drizzle in the extra virgin extract olive oil. Continue to process until the mixture starts to come together and forms a paste. You may need to scrape down the sides of the bowl with a spatula a couple of times to ensure everything is incorporated evenly. Once you have a thick paste, add the fresh lemon juice. The lemon juice not only brightens the flavor of the pesto but also helps to preserve its vibrant green color. Continue to process until the pesto reaches your desired consistency. If it’s too thick for your liking, you can add a little more olive oil, a tablespoon at a time, until it’s perfectly smooth and spreadable. Taste and adjust the salt if needed. Some people like a bit more tang, so feel free to add a tiny bit more lemon juice if that’s your preference.
Serving and Storing Your Pesto
Once your dairy-free pesto is blended to perfection, it’s ready to be enjoyed!
6. Serving Suggestions:
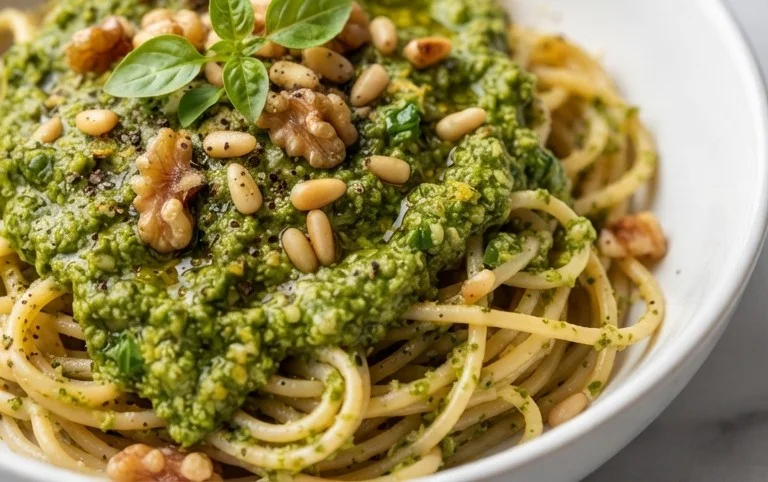
Toss this pesto with your favorite pasta, a drizzle of olive oil, and perhaps some cherry tomatoes. It’s also fantastic spread on toasted bread, a hearty sandwich, or as a base for a quick pizza. Drizzle it over grilled chicken, fish, or roasted vegetables like asparagus, broccoli, or zucchini for an instant flavor upgrade. It can even be stirred into dips or used as a marinade. The possibilities are truly endless!
7. Storing Your Pesto:
To store your dairy-free pesto, transfer it to an airtight container. For the best flavor and to prevent oxidation, it’s a good idea to pour a thin layer of olive oil over the top of the pesto before sealing the container. This creates a barrier that helps to keep the pesto fresh. You can store it in the refrigerator for up to 5-7 days. If you find you have a lot of pesto, it freezes beautifully! You can freeze it in ice cube trays, and once frozen, transfer the cubes to a freezer-safe bag for easy portioning. Frozen pesto can be stored for up to 3 months.
Enjoy this delicious, homemade dairy-free pesto! It’s a testament to how easily you can create incredible flavors without relying on dairy.
Conclusion:
I hope you’ve enjoyed learning how to make this delicious dairy free pesto! It’s truly a fantastic recipe because it’s so versatile and caters to those avoiding dairy, or even just looking for a lighter, brighter alternative. The beauty of this dairy free pesto lies in its vibrant basil flavor, the satisfying crunch of nuts (or seeds!), and the rich, tangy notes from lemon and garlic. It’s incredibly easy to whip up, making it perfect for busy weeknights or impressing guests at your next gathering.
Don’t limit yourself to just pasta! This pesto is amazing tossed with roasted vegetables, spread on sandwiches or wraps, dolloped onto grilled chicken or fish, or even used as a base for a flavorful salad dressing. Feel free to experiment with different nuts like walnuts or pine nuts, or try seeds like sunflower or pumpkin seeds for a nut-free option. You can also adjust the garlic and lemon to your personal taste.
I truly encourage you to give this dairy free pesto recipe a try. I’m confident you’ll be delighted by how fresh, flavorful, and satisfying it is. It’s a game-changer for anyone seeking plant-based alternatives without sacrificing taste.
Frequently Asked Questions about Dairy Free Pesto:
Can I freeze this dairy free pesto?
Absolutely! This dairy free pesto freezes beautifully. Portion it into ice cube trays for convenient single servings, or store it in an airtight container in the freezer for up to 3 months. When ready to use, thaw overnight in the refrigerator or gently reheat.
What kind of oil is best for this recipe?
Extra virgin extract olive oil is generally the preferred choice for its fruity flavor and quality. However, you can also use a lighter olive oil or even avocado oil if you prefer a more neutral taste.
I have a nut allergy, what can I use instead of pine nuts?
No problem at all! For a nut-free version, sunflower seeds or pumpkin seeds are excellent substitutes. They provide a lovely texture and subtle nutty flavor without any allergens.
Dairy Free Pesto
A vibrant and flavorful dairy-free pesto made with fresh basil, pine nuts, garlic, and olive oil. Perfect for pasta, sandwiches, or as a dip.
Ingredients
-
3 cups basil
-
1/2 lemon (juiced)
-
1/2 cup pine nuts
-
2 cloves garlic
-
1/4 cup olive oil
-
1/2 tsp salt
-
2 tbsp nutritional yeast
Instructions
-
Step 1
Toast pine nuts in a dry skillet over medium heat until lightly golden and fragrant. Let cool. -
Step 2
In a food processor, combine basil, toasted pine nuts, garlic, and salt. -
Step 3
Pulse until coarsely chopped. -
Step 4
With the food processor running, slowly drizzle in the olive oil until the pesto is smooth or desired consistency. -
Step 5
Stir in the lemon juice and nutritional yeast. -
Step 6
Taste and adjust seasoning if needed.
Important Information
Nutrition Facts (Per Serving)
It is important to consider this information as approximate and not to use it as definitive health advice.
Allergy Information
Please check ingredients for potential allergens and consult a health professional if in doubt.