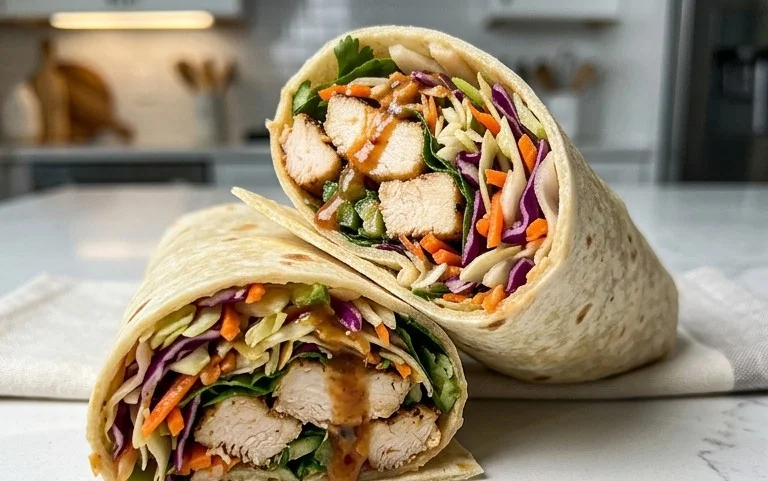
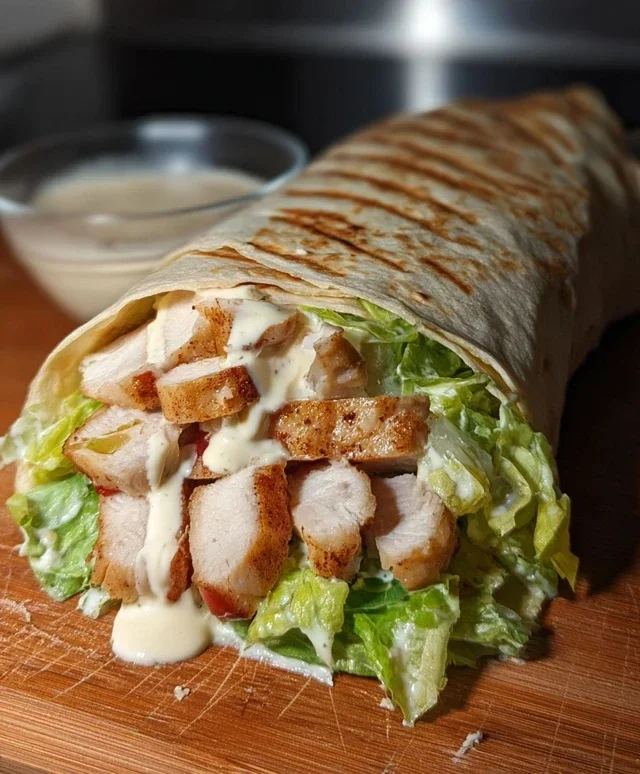
Easy Chicken Caesar Wraps – Quick & Delicious Lunch
Chicken Caesar Wraps are a weeknight dinner superstar for a reason! There’s something incredibly satisfying about the creamy, tangy Caesar dressing clingin extractg to tender grilled chicken, all nestled within a soft tortilla alongside crisp romaine lettuce and salty Parmesan. It’s that perfect harmony of textures and flavors that makes us come back for more. Whether you’re looking for a quick and easy lunch, a portable picnic option, or a crowd-pleasing dinner that doesn’t require hours in the kitchen, the Chicken Caesar Wrap delivers. What truly elevates this classic into something special is the simplicity and the ability to customize it. We can add a little crunch with croutons, a pop of sweetness with sun-dried tomatoes, or even a bit of heat with a sprinkle of red pepper flakes. These aren’t just wraps; they’re a canvas for deliciousness, and I’m thrilled to share my favorite way to make them.
Why You’ll Love These Chicken Caesar Wraps
The Ultimate Weeknight Meal Solution
Chicken Caesar Wraps
There’s something incredibly satisfying about a perfectly assembled wrap. It’s portable, customizable, and when you get the flavors just right, it’s pure comfort food. My go-to, especially for a quick and delicious lunch or a light dinner, has to be the Chicken Caesar Wrap. It takes all the classic, bold flavors of a Caesar salad – the creamy dressing, the salty Parmesan, the crisp romaine – and bundles them up into a convenient, handheld package. It’s remarkably easy to make, and you can whip up a batch for yourself or a few for family and friends in no time at all. Forget those sometimes-soggy store-bought versions; we’re making this one fresh, and you’ll taste the difference immediately.
Ingredients:
Cooking Instructions
Let’s get started on creating these delightful wraps. The key to a great Chicken Caesar Wrap is to have all your components ready to go before you start assembling. This ensures everything stays crisp and the flavors meld perfectly without any last-minute scrambling.
Preparing the Chicken
The chicken is the star of our wrap, so let’s give it the attention it deserves. For this recipe, we’re using two boneless, skinless chicken breasts. This is a fantastic lean protein source, and it cooks up beautifully. Before we cook them, it’s a good idea to pound them slightly to an even thickness. This helps them cook more uniformly and prevents some parts from drying out while others are still cooking. You can do this by placing the chicken breasts between two pieces of plastic wrap or inside a zip-top bag and using the flat side of a meat mallet or even a heavy rolling pin. Once they’re evenly thick, season them generously on both sides with salt and freshly ground black pepper. This simple seasoning enhances the natural flavor of the chicken.
Now, we need to cook the chicken. You have a few options here. My favorite method for juicy, flavorful chicken is pan-searing. Heat a tablespoon of olive oil or your preferred cooking oil in a skillet over medium-high heat. Once the oil is shimmering, carefully add the seasoned chicken breasts. Cook for about 5-7 minutes per side, or until the chicken is golden brown and cooked through. The internal temperature should reach 165 degrees Fahrenheit (74 degrees Celsius). If you prefer a healthier option, you can grill the chicken breasts or bake them in a preheated oven at 400 degrees Fahrenheit (200 degrees Celsius) for about 20-25 minutes, flipping halfway through, until cooked through. Once cooked, let the chicken rest on a cutting board for about 5-10 minutes before slicing or dicing it. This resting period allows the juices to redistribute throughout the meat, resulting in a more tender and moist chicken. After resting, I like to slice the chicken into thin strips or dice it into bite-sized pieces, depending on how I want it distributed in the wrap.
Assembling the Wraps
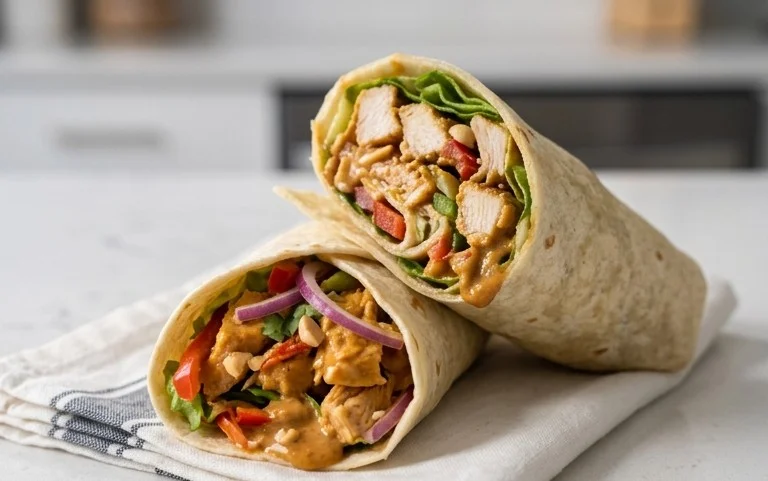
With our perfectly cooked chicken ready, it’s time to bring everything together. This is where the magic happens! We’ll be using four large tortillas for our wraps. You can gently warm your tortillas in a dry skillet, in the microwave for a few seconds, or even briefly over an open flame on a gas stove. Warming them makes them more pliable and less likely to crack when you roll them up.
Start by spreading a generous amount of your chosen Caesar dressing onto the center of each tortilla. You don’t want to go all the way to the edges, as it will likely squeeze out when you wrap it. Aim for a good coating that will flavor every bite. Now, lay down a bed of your chopped romaine lettuce. The crispness of the romaine is essential for that classic Caesar salad texture within the wrap. Distribute the fresh, vibrant greens evenly over the dressing.
Next, add the star of our show: the prepared chicken. Pile a good portion of the sliced or diced chicken over the lettuce. Don’t be shy; you want a satisfying amount of chicken in each wrap. Sprinkle a generous amount of grated Parmesan cheese over the chicken and lettuce. The salty, nutty flavor of the Parmesan is what really ties the Caesar flavors together. If you like a little extra kick, you can always add a crack of black pepper at this stage.
Now for the grand finnon-alcoholic ale – rolling the wraps! This can be a bit tricky the first time, but with a little practice, you’ll be a pro. Fold in the sides of the tortilla snugly over the filling. Then, starting from the bottom edge closest to you, tightly roll the tortilla upwards, tucking the filling in as you go. You want to aim for a compact roll that holds everything together. If your tortillas are very full, you might find it easier to cut them in half after rolling for easier handling.
And there you have it! Delicious, homemade Chicken Caesar Wraps ready to be devoured. They are perfect for a quick lunch, a light dinner, or even a portable meal to take on the go. Enjoy every flavorful, creamy, and crisp bite!

Conclusion:
There you have it – a foolproof guide to crafting incredibly delicious Chicken Caesar Wraps that are perfect for any occasion! These wraps are a weeknight dinner hero, a fantastic lunchbox option, or even a crowd-pleasing appetizer. The beauty of this recipe lies in its simplicity, allowing the classic flavors of romaine, grilled chicken, Caesar dressing, and Parmesan to truly shine. Plus, the wrap format makes them portable and delightfully easy to eat, minimizing mess and maximizing enjoyment. I truly hope you’ll give these Chicken Caesar Wraps a try and discover how satisfying and flavorful they are!
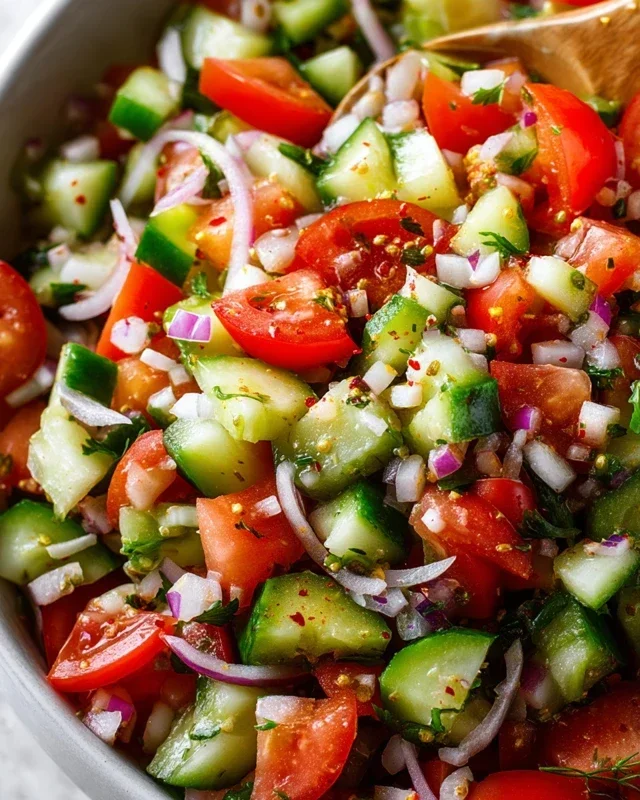
Don’t be afraid to get creative! These wraps are incredibly versatile. Consider adding a handful of cherry tomatoes for a burst of freshness, some crunchy croutons for extra texture, or even a sprinkle of red pepper flakes for a hint of heat. For a lighter option, skip the croutons or opt for a lower-fat Caesar dressing. Whatever you choose, I’m confident you’ll love the results.
Frequently Asked Questions:
Can I make the chicken ahead of time?
Absolutely! For ultimate convenience, you can grill or pan-fry your chicken breasts a day or two in advance. Once cooled, store them in an airtight container in the refrigerator. Simply slice or dice them when you’re ready to assemble your Chicken Caesar Wraps.
What other proteins can I use instead of chicken?
While chicken is a classic, feel free to experiment! Grilled shrimp, flaked salmon, or even crispy tofu are fantastic alternatives that will bring a unique twist to your wraps. Each offers a delicious protein option that pairs wonderfully with the Caesar dressing.
Can I make the Caesar dressing from scratch?
Yes, you certainly can! A homemade Caesar dressing elevates these wraps even further. Whisk together mayonnaise, Dijon mustard, Worcestershire sauce, garlic powder, lemon juice, and grated Parmesan cheese for a zesty, authentic flavor that complements the other ingredients perfectly.
Chicken Caesar Wraps
Quick and easy chicken Caesar wraps, perfect for a light lunch or dinner. Uses grilled chicken and classic Caesar flavors.
Ingredients
-
2 boneless, skinless chicken breasts
-
4 large tortillas
-
2 cups chopped romaine lettuce
-
1/2 cup grated Parmesan cheese
-
Caesar dressing
-
Salt to taste
-
Pepper to taste
Instructions
-
Step 1
Preheat grill or skillet to medium-high heat. Season chicken breasts with salt and pepper. -
Step 2
Grill or cook chicken breasts for about 6-8 minutes per side, or until cooked through. Let rest for a few minutes, then slice or dice. -
Step 3
In a bowl, combine chopped romaine lettuce and grated Parmesan cheese. Add a few tablespoons of Caesar dressing and toss to coat. -
Step 4
Warm the tortillas slightly according to package directions to make them more pliable. -
Step 5
Divide the Caesar salad mixture and cooked chicken evenly among the four tortillas. -
Step 6
Drizzle additional Caesar dressing over the filling in each tortilla, if desired. -
Step 7
Fold in the sides of the tortillas and then roll them up tightly to form the wraps. Slice in half if preferred.
Important Information
Nutrition Facts (Per Serving)
It is important to consider this information as approximate and not to use it as definitive health advice.
Allergy Information
Please check ingredients for potential allergens and consult a health professional if in doubt.