Dark Chocolate Sea Salt Nut Bars-Decadent Treat
Dark Chocolate and Sea Salt Nut Bars are an absolute game-changer when you’re craving something satisfyingly sweet, a little salty, and wonderfully wholesome. Forget those mass-produced candy bars that leave you feeling sluggish; these homemade delights are here to rescue your snack time. There’s a reason why this irresistible combination of rich, decadent dark chocolate and the surprising pop of flaky sea salt has captured so many hearts (and taste buds!). It’s that perfect balance – the intense cocoa notes mingling with the bright salinity, all held together by the satisfying crunch of wholesome nuts. What truly sets these Dark Chocolate and Sea Salt Nut Bars apart is their versatility. They’re perfect for a post-workout refuel, a midday energy boost, or even as a sophisticated treat alongside your afternoon coffee. I adore them because they feel like a luxurious indulgence without any of the guilt. Get ready to discover your new favorite no-bake obsession!
Ingredients:
Are you craving a treat that’s both satisfyingly crunchy and decadently chocolatey, with just a hint of salty perfection? Look no further than these Dark Chocolate and Sea Salt Nut Bars! These homemade bars are incredibly easy to whip up and are perfect for a quick energy boost, a lunchbox treat, or even a sophisticated dessert. They strike a beautiful balance between wholesome ingredients and indulgent flavor, making them a go-to recipe in my kitchen. The combination of crunchy nuts, airy puffed rice, rich dark chocolate, and the subtle pop of sea salt is truly irresistible.
The beauty of these bars lies in their simplicity and adaptability. You can really make them your own by choosing your favorite nuts. I love the blend of cashews for their creaminess, peanuts for their classic crunch, and almonds for their satisfying bite. But feel free to experiment with walnuts, pecans, pistachios, or any other nut you adore! The puffed rice adds a delightful lightness, preventing the bars from becoming too dense, while the brown rice syrup acts as our natural binder, giving everything that perfect chewy-crisp texture. And of course, the star of the show: dark chocolate. The richer the better in my opinion, as it complements the salt and nuts so beautifully.
Preparing Your Workspace and Ingredients
Before we dive into the mixing and baking, it’s important to have everything ready to go. This recipe comes together quite quickly once you start, so a little prep work will make the process much smoother. First, line an 8×8 inch baking pan with parchment paper, leaving some overhang on the sides. This will make it incredibly easy to lift the entire slab of bars out of the pan once they’re set. Make sure the parchment paper covers the bottom and comes up the sides of the pan.
Next, if you are using whole nuts, give them a rough chop. You don’t want them to be powder, but rather in bite-sized pieces that will create a pleasing texture in the finished bar. A good rule of thumb is to aim for pieces that are roughly the size of a pea or a small pebble. This ensures you get a good distribution of nuts throughout the bar. Set aside your chopped nuts. Have your puffed rice measured and ready.
Combining the Dry and Wet Ingredients
In a large mixing bowl, combine your prepared nuts and the puffed rice. Give them a gentle toss to distribute them evenly. This is where the base of our delicious bars is formed. The variety of nuts will provide a complex flavor and a satisfying chew, while the puffed rice adds that essential lightness and crunch.
In a separate, smaller saucepan, gently heat the brown rice syrup over medium-low heat. You don’t want it to boil vigorously, just to warm it up enough so that it becomes more fluid and easier to mix. Once it’s warmed through, stir in the vanilla extract and the 1/2 teaspoon of sea salt. The vanilla extract adds a lovely aromatic depth, and the sea salt is crucial for balancing the sweetness and enhancing all the other flavors. Whisk it all together until well combined.
Creating the Nut Bar Base
Now, pour the warmed brown rice syrup mixture over the nut and puffed rice mixture in the large bowl. Using a sturdy spatula or a wooden spoon, stir everything together thoroughly. It’s important to make sure that every single piece of nut and puffed rice is coated in the syrup. This can take a minute or two of vigorous stirring. Don’t be afraid to get in there and really mix it well. You want a cohesive mixture that will hold together when pressed.
Once everything is thoroughly combined, transfer this mixture to your prepared baking pan. Using your spatula, press the mixture down firmly and evenly into the pan. The more firmly you press, the more compact and less crum extractbly your bars will be. You can even use the bottom of a glass or a small plate to help you get a really solid, even layer. This pressing step is key to ensuring your bars hold their shape once cut.
Melting the Chocolate and Adding the Finishing Touch
While your nut mixture is pressing in the pan, you can prepare your chocolate topping. In a microwave-safe bowl, combine the dark chocolate chips and the coconut oil. Microwave in 30-second intervals, stirring well after each interval, until the chocolate is completely melted and smooth. Be careful not to overheat the chocolate, as it can seize and become difficult to work with. The coconut oil helps to create a beautifully smooth and pourable chocolate ganache that will harden nicely.
Once the chocolate is melted and glossy, pour it evenly over the pressed nut mixture in the baking pan. Use your spatula to spread the chocolate all the way to the edges, ensuring a complete chocolatey coating. This is the moment of truth for that decadent finish!
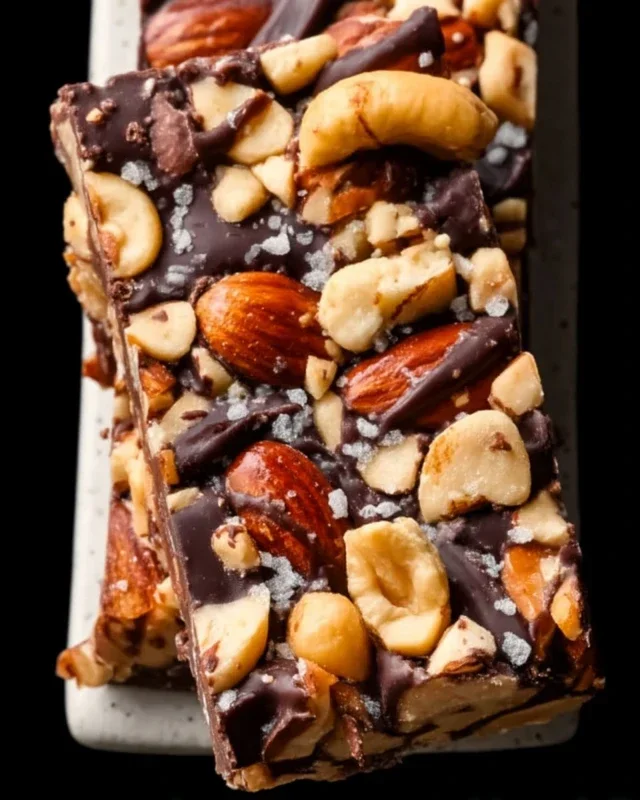
If you are using flaky sea salt for topping, sprinkle it generously over the melted chocolate. This adds a beautiful visual appeal and an extra burst of salty-sweet flavor with every bite. The larger flakes of salt provide a delightful crunch and a pronounced salty counterpoint to the rich chocolate and the nutty base.
Chilling and Cutting Your Bars
Now comes the hardest part: waiting! Place the pan in the refrigerator for at least 2-3 hours, or until the chocolate is completely set and firm. For even faster setting, you can pop it in the freezer for about an hour. This chilling process is essential for allowing the bars to firm up so you can cut them cleanly.
Once the bars are thoroughly chilled and the chocolate is hard, use the parchment paper overhang to carefully lift the entire slab out of the pan. Place it on a cutting board and, using a sharp knife, cut the slab into your desired bar shapes. I usually aim for about 12 bars, but you can make them larger or smaller depending on your preference. Wipe your knife clean between cuts if needed to ensure neat edges.
Store your delicious Dark Chocolate and Sea Salt Nut Bars in an airtight container in the refrigerator. They will keep well for up to a week, though I doubt they’ll last that long! Enjoy this homemade delight whenever you need a little something special.

Conclusion:
And there you have it! These Dark Chocolate and Sea Salt Nut Bars are a truly spectacular treat that strikes the perfect balance between rich, decadent dark chocolate and the satisfying crunch of mixed nuts, all elevated by that delightful hint of sea salt. They are incredibly versatile, making them ideal for a quick breakfast on the go, a mid-afternoon energy boost, or even a sophisticated dessert when you’re craving something sweet but not overly heavy. I’ve found they disappear incredibly fast in my household, which is always a good sign!
Feel free to get creative with your nut choices – almonds, walnuts, pecans, or even pistachios all work wonderfully. You can also add a sprinkle of your favorite seeds like chia or pumpkin seeds for an extra nutritional punch. Don’t be afraid to experiment with different types of dark chocolate too; a higher cocoa content will give you a more intense flavor.
I wholeheartedly encourage you to give these Dark Chocolate and Sea Salt Nut Bars a try. They are surprisingly simple to make, require no baking, and the results are consistently delicious. I’m confident you’ll love them as much as I do!
Frequently Asked Questions:
Q: How should I store these nut bars?
A: These bars store best in an airtight container at room temperature for up to a week. If your kitchen is particularly warm, you might prefer to store them in the refrigerator, though this can slightly firm up the chocolate.
Q: Can I make these vegan?
A: Absolutely! Simply ensure you use a vegan-friendly dark chocolate for melting, and double-check that any binders or sweeteners you use are also vegan. The base recipe is very adaptable.
Q: What if I don’t have parchment paper?
A: While parchment paper makes for easy removal and cleanup, you can lightly grease your baking dish with a neutral oil or cooking spray. However, parchment paper is highly recommended for the cleanest results.
Dark Chocolate and Sea Salt Nut Bars
Decadent no-bake bars featuring a blend of nuts, puffed rice, and dark chocolate, finished with a sprinkle of sea salt.
Ingredients
-
2 1/2 cups unsalted nuts of choice (7/12 cup cashews, 7/12 cup peanuts and 10/12 cup almonds)
-
1/2 cup puffed rice
-
1/4 cup brown rice syrup
-
1 1/2 teaspoon vanilla extract
-
1/2 teaspoon sea salt
-
1 cup dark chocolate chips
-
2 teaspoons coconut oil
-
Optional: flaky salt for topping
Instructions
-
Step 1
Line an 8×8 inch baking pan with parchment paper, leaving some overhang. -
Step 2
In a large bowl, combine the nuts and puffed rice. -
Step 3
In a small saucepan over low heat, warm the brown rice syrup and vanilla extract until just combined. -
Step 4
Pour the warm syrup mixture over the nut and rice mixture. Add the sea salt and stir until everything is evenly coated. -
Step 5
Press the mixture firmly into the prepared baking pan. -
Step 6
In a microwave-safe bowl, melt the dark chocolate chips with the coconut oil in 30-second intervals, stirring in between, until smooth. -
Step 7
Pour the melted chocolate over the nut mixture, spreading it evenly to cover the surface. -
Step 8
If desired, sprinkle with flaky salt for topping. -
Step 9
Refrigerate for at least 30 minutes, or until the chocolate is firm. Cut into bars and serve.
Important Information
Nutrition Facts (Per Serving)
It is important to consider this information as approximate and not to use it as definitive health advice.
Allergy Information
Please check ingredients for potential allergens and consult a health professional if in doubt.