Mini Cannoli Cups- Easy Italian Dessert Recipe
Mini Cannoli Cups are about to become your new favorite sweet treat! Forget the fuss and the frying; these delightful little delights capture all the classic, irresistible flavors of traditional cannoli in an easy-to-make, bite-sized package. If you’re like me, the idea of a perfectly crisp shell filled with creamy, dreamy ricotta filling is pure heaven. But let’s be honest, making authentic cannoli can feel intimidating. That’s precisely why Mini Cannoli Cups are so brilliant. They deliver that iconic crunch and luscious sweetness without the stress, making them perfect for parties, a weeknight indulgence, or just because you deserve a little bit of joy. What truly sets these Mini Cannoli Cups apart is their adaptability – you can customize the filling and toppings to your heart’s content, ensuring every bite is a personalized masterpiece. Get ready to impress yourself and everyone you share these with!
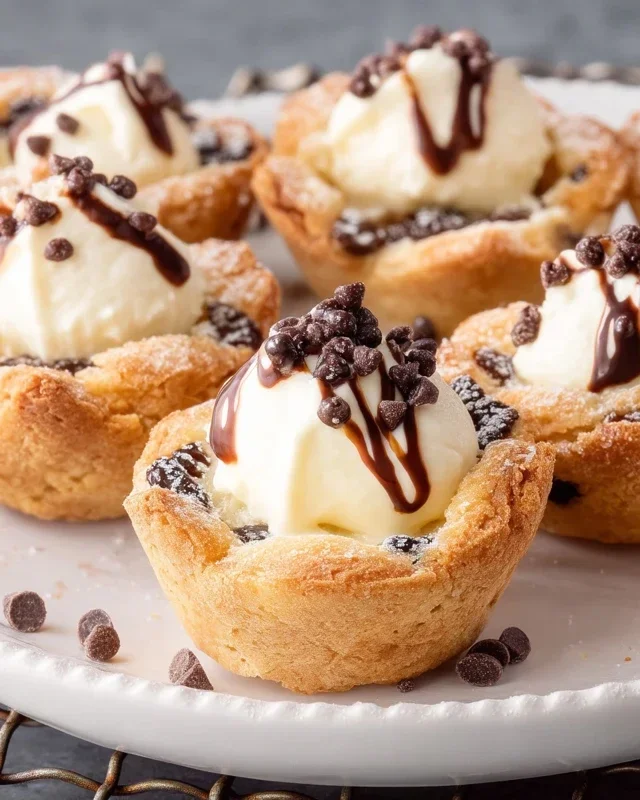
Mini Cannoli Cups
Who can resist a classic cannoli? The crispy, crunchy shell filled with sweet, creamy ricotta is an Italian dessert icon. But let’s be honest, making traditional cannoli shells can be a bit intimidating, involving rolling out dough, shaping it around tubes, and deep-frying. Today, we’re taking a delightful shortcut with Mini Cannoli Cups! These adorable treats capture all the beloved flavors and textures of a cannoli but are incredibly easy to whip up using readily available refrigerated pie crusts. Perfect for parties, potlucks, or simply satisfying that sweet craving without the fuss, these mini delights are sure to impress.
Ingredients:
Let’s Get Baking!
Here’s how we’ll transform these simple ingredients into delightful Mini Cannoli Cups.
Preparing the Ricotta Filling:
First things first, let’s create that luscious ricotta filling. Make sure your ricotta cheese is well-drained. You can do this by placing it in a fine-mesh sieve lined with cheesecloth or a coffee filter over a bowl for at least an hour, or even overnight in the refrigerator. This step is crucial to prevent a watery filling. Once drained, transfer the ricotta to a medium bowl. Add the 1/2 cup of powdered sugar, 2 tablespoons of granulated sugar, the finely grated orange or lemon zest (I love the brightness of lemon zest, but orange adds a lovely sweetness too!), and the 1/2 teaspoon of vanilla extract. Use a rubber spatula or a whisk to gently combine everything until it’s smooth, creamy, and well-incorporated. Don’t overmix; we want a delicate texture. Taste and adjust sweetness if needed, but remember we’ll be dusting these with more powdered sugar later. Set this glorious filling aside while we prepare our “shells.”
Creating the Pie Crust Cups:
Now for the magic of the pie crusts! Preheat your oven to 375°F (190°C). Lightly grease a 24-cup mini muffin tin. Unroll your softened refrigerated pie crusts. If the dough seems a little sticky, you can lightly dust your surface and the dough with a tiny bit of flour. Using a 2.5 to 3-inch round cookie cutter, cut out as many circles as you can from each pie crust. You’ll likely get about 10-12 circles per crust, so aim for around 20-24 circles in total. Gently press each dough circle into the greased mini muffin cups, ensuring it comes up the sides to form a little cup. You want the dough to fit snugly without tearing. If any dough tears, you can gently press it back together. Prick the bottom of each dough cup a few times with a fork. This helps prevent the crust from puffing up too much during baking.
Baking the Shells and Preparing the Cinnamon Sugar:
In a small bowl, combine the 3 tablespoons of turbinado sugar and 1 teaspoon of ground cinnamon. Mix them together thoroughly. This will be our delicious coating for the baked cups. Place the prepared mini muffin tin in the preheated oven and bake for 10-14 minutes, or until the edges are golden brown and the crust is set. Keep an eye on them as ovens can vary. While the crusts are baking, you can prepare your toppings. Have your miniature semisweet chocolate chips or finely chopped pistachios ready. Once the crusts are baked to a beautiful golden hue, carefully remove the muffin tin from the oven. Immediately, while the crusts are still warm and slightly pliable, gently invert the mini muffin tin over a wire rack to release the baked cups. If they stick a bit, you can use a small offset spatula or butter knife to help them along.
Coating and Cooling:
Working quickly while the cups are still warm (but cool enough to handle safely), brush the outsides of each baked cup with a tiny bit of water or melted butter. This will help the cinnamon sugar adhere. Then, roll the brushed outsides of the cups in the prepared cinnamon sugar mixture, ensuring an even coating. Place the coated cups back onto the wire rack to cool completely. This cooling process is important; if you try to fill them while they’re warm, the ricotta filling might become runny and the crust could soften too much. Patience is key here for the perfect crispness.
Filling and Decorating:
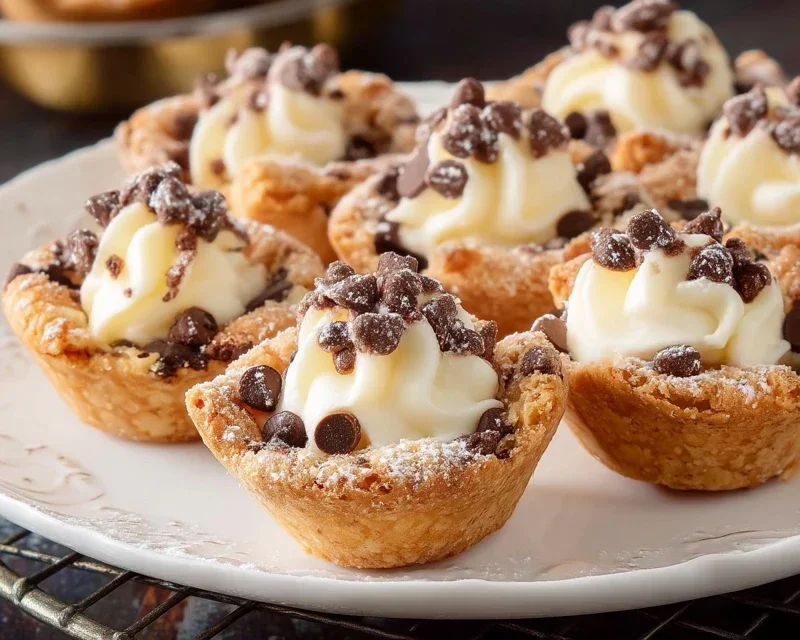
Once the pie crust cups are completely cool, it’s time for the grand finnon-alcoholic ale! Spoon or pipe the prepared ricotta filling into each cooled cannoli cup. You can use a piping bag with a plain tip for a neater presentation, or simply a spoon. Don’t overfill them; we want a generous but manageable amount. Now for the fun part: decorating! Sprinkle the tops of the filling with your miniature semisweet chocolate chips or finely chopped pistachios. These add a delightful crunch and visual appeal. Finally, for that classic cannoli look, dust the tops generously with additional powdered sugar just before serving. The contrast of the white sugar against the filling and toppings is simply irresistible.
These Mini Cannoli Cups are best enjoyed fresh, so assemble them shortly before you plan to serve them. They are a wonderfully approachable way to enjoy the flavors of cannoli without the traditional complexities. Enjoy every delightful, bite-sized moment!
Conclusion:
These mini cannoli cups are a delightful and surprisingly simple way to bring a taste of Italy right into your kitchen! They are a fantastic choice for parties, desserts after a special meal, or simply as a treat to brighten your day. The crisp, golden pastry shells combined with the sweet, creamy ricotta filling create a textural and flavor explosion that’s utterly irresistible. I truly believe you’ll find this recipe incredibly rewarding, especially when you see the joy on people’s faces as they enjoy these little bites of heaven. Don’t be intimidated by cannoli; this mini version makes it accessible for everyone to achieve delicious results!
When it comes to serving, consider presenting these mini cannoli cups on a tiered dessert stand for a show-stopping centerpiece. They are perfect as individual desserts, but also fantastic as part of a dessert buffet alongside other Italian-inspired treats. For variations, feel free to experiment with the filling! You can add a touch of espresso powder for a mocha twist, finely chopped pistachios for crunch and color, or even a hint of orange zest for a brighter flavor profile. The possibilities are endless!
I wholeheartedly encourage you to give this mini cannoli cup recipe a try. I’m confident you’ll fall in love with how easy they are to make and how impressive they look and taste. Happy baking!
Frequently Asked Questions:
Can I make the cannoli shells ahead of time?
Yes, absolutely! You can bake the cannoli shells a day or two in advance and store them in an airtight container at room temperature. Ensure they are completely cooled before storing to maintain their crispness.
What if I can’t find ricotta cheese?
While ricotta is traditional, you can substitute with a well-drained mascarpone cheese for a richer, creamier filling. Another option is to drain regular cream cheese very well and mix it with a little heavy cream until it reaches a smooth, pipeable consistency.
Mini Cannoli Cups
Delightful mini cannoli cups featuring a creamy ricotta filling encased in a crisp baked pie crust, perfect for a sweet treat.
Ingredients
-
1 container whole-milk ricotta cheese (15 oz., drained)
-
1/2 cup powdered sugar
-
2 tablespoons granulated sugar
-
1 teaspoon finely grated orange zest
-
1/2 teaspoon vanilla extract
-
1 box refrigerated pie crusts (2 count)
-
3 tablespoons turbinado sugar
-
1 teaspoon ground cinnamon
-
1/4 cup miniature semisweet chocolate chips
Instructions
-
Step 1
Preheat oven to 375°F (190°C). Grease and flour 12 muffin cups. -
Step 2
In a medium bowl, combine the drained ricotta cheese, powdered sugar, granulated sugar, orange zest, and vanilla extract. Mix until smooth and well combined. -
Step 3
Unroll the refrigerated pie crusts. Cut each crust into 6 equal pieces. Gently press each piece into the greased muffin cups, forming a shell. -
Step 4
Bake for 10-12 minutes, or until the crusts are golden brown and slightly puffed. -
Step 5
While the crusts are still warm, carefully remove them from the muffin tin and let them cool completely on a wire rack. -
Step 6
In a small bowl, combine the turbinado sugar and ground cinnamon. Mix well. -
Step 7
Once the cannoli cups are completely cool, fill them with the ricotta mixture. Sprinkle the tops with the cinnamon-sugar mixture and miniature chocolate chips. -
Step 8
Dust with additional powdered sugar before serving, if desired.
Important Information
Nutrition Facts (Per Serving)
It is important to consider this information as approximate and not to use it as definitive health advice.
Allergy Information
Please check ingredients for potential allergens and consult a health professional if in doubt.