Fresh Fruit Tart Recipe- Delicious & Easy Dessert
Fruit tart is more than just a dessert; it’s a vibrant masterpiece that sings of sunshine and summer’s bounty. Imagin extracte a crisp, buttery crust cradling a silken custard, all topped with a jewel-toned mosaic of the freshest seasonal fruits. Who can resist the irresistible allure of a perfectly executed fruit tart? It’s that delightful contrast of textures – the tender, yielding fruit against the satisfying crunch of the pastry – coupled with the delightful explosion of natural sweetness that makes this dish a perennial favorite. What truly sets a homemade fruit tart apart is the personal touch, the care taken in selecting each fruit, and the joy of sharing a slice of pure, edible artistry with loved ones. I find there’s an inherent elegance in its simplicity, a celebration of ingredients at their peak that makes it feel both sophisticated and wonderfully approachable.
Fruit Tart
Welcome to a delightful journey of creating a stunning and delicious fruit tart! This recipe is perfect for impressing guests, celebrating a special occasion, or simply treating yourself to a homemade masterpiece. We’ll be crafting a buttery, crisp tart shell filled with a luscious vanilla pastry cream and then adorned with a vibrant medley of fresh fruits. Don’t be intimidated by its elegant appearance; with these straightforward instructions, you’ll be whipping up beautiful fruit tarts in no time.
Ingredients:
Making the Perfect Tart Shell
The foundation of any great tart is a crisp, flavorful shell. We’ll start by preparing our dough. In a medium bowl, whisk together the all-purpose flour and powdered sugar. This dry mixture will provide sweetness and structure to our crust. Next, add the cold, cubed butter. Using your fingertips, a pastry blender, or a food processor, work the butter into the flour mixture until it resembles coarse crum extractbs with some pea-sized pieces of butter still visible. These little pockets of butter are key to creating a flaky crust.
Now, it’s time to bring the dough together. Gradually add the cold water, one tablespoon at a time, mixing gently with a fork or your hands until the dough just starts to come together. Be careful not to overmix, as this can result in a tough crust. You might not need the full two tablespoons of water; the goal is just enough to hydrate the flour and bind the dough. Once the dough forms a cohesive ball, flatten it into a disc, wrap it tightly in plastic wrap, and refrigerate for at least 30 minutes. This chilling period is crucial for relaxing the gluten and making the dough easier to roll out.
When you’re ready to bake, preheat your oven to 375°F (190°C). Lightly flour a clean surface and your rolling pin. Unwrap the chilled dough and roll it out into a circle about 12 inches in diameter and about 1/8 inch thick. Carefully transfer the rolled-out dough to a 9-inch tart pan with a removable bottom. Gently press the dough into the bottom and up the sides of the pan, ensuring it’s evenly distributed. Trim any excess dough hangin extractg over the edges. To prevent the crust from puffing up during baking, prick the bottom of the tart shell all over with a fork. This is called ‘docking’ and it allows steam to escape.
Blind Baking for a Crispy Crust
To ensure a perfectly crisp tart shell that won’t get soggy from the pastry cream, we’ll blind bake it. Line the unbaked tart shell with parchment paper or aluminum foil, making sure it covers the dough and extends up the sides. Fill the lined shell with pie weights, dried beans, or uncooked rice. These weights will help the crust maintain its shape as it bakes. Place the tart pan on a baking sheet (this makes it easier to move in and out of the oven and catches any potential spills) and bake for 15 minutes.
After 15 minutes, carefully remove the tart shell from the oven. Lift out the parchment paper and weights. Return the tart shell to the oven and bake for another 8-10 minutes, or until the crust is lightly golden brown and cooked through. Keep an eye on it to prevent it from burning. Once baked, remove from the oven and let it cool completely in the tart pan.
Crafting the Luscious Vanilla Pastry Cream
While our tart shell cools, let’s whip up the creamy filling. In a medium saucepan, whisk together the milk and vanilla extract. Heat this mixture over medium heat until it’s just simmering – don’t let it boil. In a separate bowl, whisk together the egg yolks, granulated sugar, and cornstarch until pnon-alcoholic ale and smooth. This mixture should be thick and creamy.
Once the milk is simmering, temper the egg yolk mixture by slowly pouring about half of the hot milk into the egg mixture while whisking constantly. This process gradually raises the temperature of the egg yolks, preventing them from scrambling. Once thoroughly combined, pour the tempered egg mixture back into the saucepan with the remaining milk.
Continue to cook over medium-low heat, stirring constantly with a whisk or wooden spoon, until the pastry cream thickens considerably and coats the back of your spoon. This usually takes about 5-8 minutes. Be patient and keep stirring to avoid lumps. Remove from the heat and stir in the tablespoon of butter until it’s fully melted and incorporated. This adds a lovely richness and shine to the pastry cream. Pour the pastry cream into a clean bowl, press a piece of plastic wrap directly onto the surface to prevent a skin from forming, and let it cool completely. You can speed this up by placing the bowl in an ice bath.
Assembling Your Masterpiece
With your cooled tart shell and chilled pastry cream ready, it’s time for the exciting part – assembly! Once the pastry cream is completely cool and has a smooth, thick consistency, give it a good whisk to loosen it up. Spoon the pastry cream into the cooled tart shell and spread it evenly using an offset spatula or the back of a spoon.
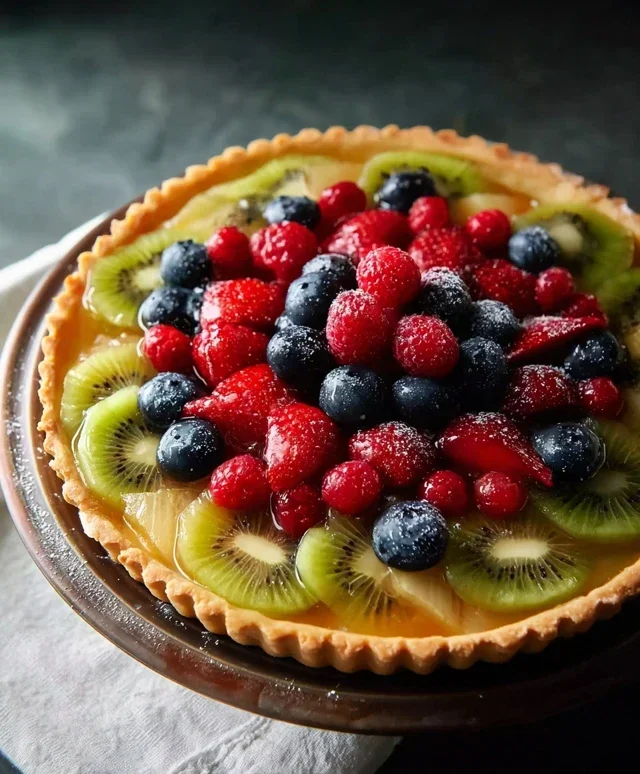
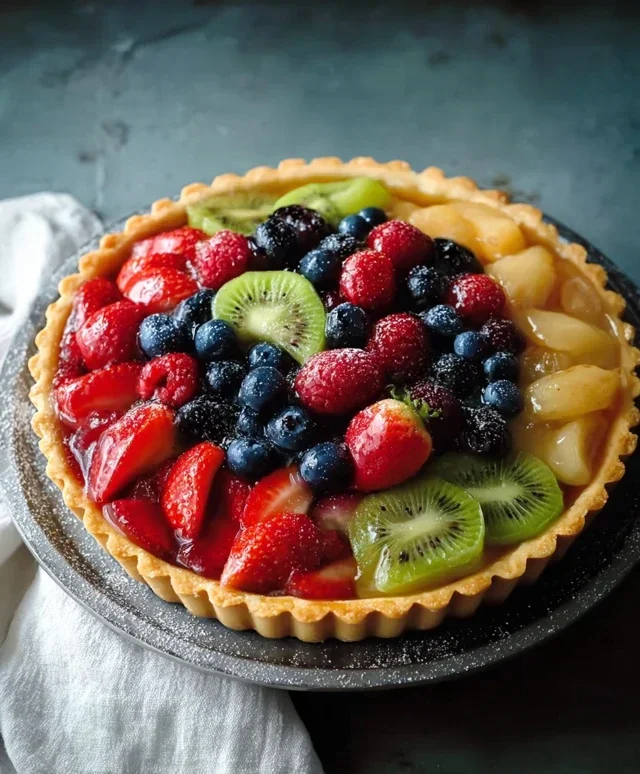
Now comes the fun of decorating! Arrange your beautifully sliced fresh strawberries, kiwis, mangoes, and blackberries artfully over the pastry cream. Get creative with your patterns and colors. Aim for a visually appealing arrangement that highlights the freshness of the fruit.
The Finishing Touch: A Gleaming Glaze
For a professional and delicious finish, we’ll create a simple glaze. In a small saucepan or microwave-safe bowl, gently heat the apricot jam with a tablespoon or two of water until it becomes smooth and spreadable. You want it to be warm and slightly fluid, but not hot.
Using a pastry brush, gently brush the warm apricot glaze over the fruit. This glaze not only adds a beautiful sheen, making your fruit tart look irresistible, but it also helps to preserve the fruit and prevent it from drying out.
Chill your finished fruit tart for at least 30 minutes before serving to allow the flavors to meld and the pastry cream to set further. Slice and enjoy this delightful creation!
Conclusion:
There you have it – a truly delightful fruit tart recipe that’s surprisingly achievable and endlessly rewarding. This tart is a celebration of fresh flavors and textures, with its buttery, crisp crust and luscious, creamy filling. It’s not just a dessert; it’s a showstopper that will impress your friends and family, and importantly, it’s a joy to make. The beauty of this fruit tart lies in its versatility. Whether you’re a seasoned baker or a begin extractner looking to tackle something special, this recipe provides a fantastic foundation for creating a memorable treat.
Don’t be afraid to get creative with your fruit selection! Seasonal fruits will always yield the best flavor. Imagin extracte a summer tart bursting with berries and peaches, or an autumn version adorned with figs and pears. Serve it chilled for a refreshing finish to any meal, or at room temperature alongside a scoop of vanilla ice cream or a dollop of whipped cream for added indulgence. This fruit tart is perfect for brunches, potlucks, holidays, or simply as a beautiful way to brighten your day.
Frequently Asked Questions:
What kind of fruit should I use for my fruit tart?
The best part about this fruit tart is its adaptability! I recommend using fresh, in-season fruits for the most vibrant flavor. Berries like strawberries, blueberries, raspberries, and blackberries are always a crowd-pleaser. Peaches, plums, kiwi, grapes, and even thinly sliced apples or pears also work wonderfully. Aim for a mix of colors and textures to make your tart visually appealing and delicious.
Can I make the tart crust ahead of time?
Absolutely! You can prepare the tart crust up to two days in advance and store it, unbaked, tightly wrapped in the refrigerator. You can also par-bake the crust and then store it at room temperature, or even freeze it for later use. This makes assembling your fruit tart on the day of serving much quicker and less stressful.
How do I prevent the fruit from making the crust soggy?
To avoid a soggy bottom, ensure your crust is fully baked and cooled before adding the filling. Additionally, consider brushing the inside of the par-baked crust with a thin layer of melted chocolate or a glaze after it cools. This creates a barrier that helps keep the moisture from the fruit from seeping into the crust. Letting the assembled tart chill in the refrigerator for at least 30 minutes before serving also helps the flavors meld and the crust firm up.
Fresh Fruit Tart
A delightful and vibrant fruit tart with a crisp pastry crust, creamy vanilla custard, and a medley of fresh seasonal fruits, finished with a glistening apricot glaze.
Ingredients
-
1 1/4 cups all-purpose flour
-
1/4 cup powdered sugar
-
1/2 cup cold butter, cubed
-
1-2 tablespoons cold water
-
1 cup milk
-
1 teaspoon vanilla extract
-
3 egg yolks
-
1/4 cup granulated sugar
-
2 tablespoons cornstarch
-
1 tablespoon butter
-
Fresh strawberries, sliced
-
Fresh kiwis, sliced
-
Fresh mangoes, sliced
-
Fresh blackberries
-
2 tablespoons apricot jam
Instructions
-
Step 1
For the crust, combine flour and powdered sugar. Cut in cold butter until mixture resembles coarse crumbs. Gradually add cold water, 1 tablespoon at a time, until dough just comes together. Wrap in plastic and chill for at least 30 minutes. -
Step 2
Preheat oven to 375°F (190°C). Roll out chilled dough and press into a 9-inch tart pan with removable bottom. Prick the bottom with a fork. Bake for 15-20 minutes, or until golden brown. Let cool completely. -
Step 3
For the pastry cream, whisk together egg yolks, granulated sugar, and cornstarch in a medium bowl until smooth. -
Step 4
In a saucepan, heat milk and vanilla extract until simmering. Gradually whisk hot milk into the egg yolk mixture. Return the mixture to the saucepan and cook over medium heat, whisking constantly, until thickened. Stir in 1 tablespoon butter until melted and incorporated. Pour into a clean bowl, cover with plastic wrap directly on the surface, and chill until cold. -
Step 5
Spread the chilled pastry cream evenly into the cooled tart shell. -
Step 6
Arrange fresh sliced strawberries, kiwis, mangoes, and blackberries decoratively over the pastry cream. -
Step 7
Gently warm apricot jam until pourable. Brush the jam over the fruit to create a glaze. Chill tart before serving.
Important Information
Nutrition Facts (Per Serving)
It is important to consider this information as approximate and not to use it as definitive health advice.
Allergy Information
Please check ingredients for potential allergens and consult a health professional if in doubt.