Easy Chia Seed Pudding Recipe – Healthy & Delicious
Chia seed pudding recipe wonders are truly something special, and for good reason! If you’re looking for a ridiculously simple yet incredibly satisfying breakfast or snack, then you’ve landed in the right place. I’ve fallen head over heels for this dish, and I’m confident you will too. What makes chia seed pudding so beloved? It’s the magical transformation that happens when tiny chia seeds meet liquid – they swell up, creating a wonderfully thick, creamy texture that’s remarkably similar to traditional pudding, but with a nutritional punch that blows it out of the water. It’s naturally vegan, gluten-free, and packed with fiber, omega-3 fatty acids, and antioxidants. Plus, the base recipe is wonderfully adaptable, allowing you to customize it with your favorite fruits, nuts, and sweeteners. Let’s dive into crafting your perfect bowl of this delightful chia seed pudding recipe!
Ingredients:
The Magic of Chia Seed Pudding: A Simple, Healthy Treat
I absolutely love chia seed pudding. It’s one of those versatile, no-fuss recipes that feels like a decadent treat but is secretly packed with nutrients. It’s perfect for a quick breakfast, a healthy snack, or even a light dessert. The best part? It requires minimal effort and just a few simple ingredients. You literally just stir everything together and let it work its magic in the fridge. Over the years, I’ve experimented with different milks and sweeteners, and while the base recipe is incredibly forgiving, there are a few little tricks I’ve learned to ensure you get that perfect pudding-like consistency every time. Forget complicated cooking methods; this is as simple as it gets, making it a go-to for busy mornings or when you need something satisfying without a lot of fuss. The beautiful thing about chia seeds is their ability to absorb liquid and create a gel-like substance, which is the secret to this pudding’s delightful texture. They’re also a fantastic source of fiber, omega-3 fatty acids, and various micronutrients, making this pudding a nutritional powerhouse disguised as a dessert.
Crafting Your Perfect Chia Seed Pudding
Here’s the breakdown of how to make this incredibly easy and delicious chia seed pudding.
1. Combine the Dry Ingredients and Milk: In a medium-sized bowl or a jar with a lid, add your 3 tablespoons of chia seeds. Now, pour in your 3/4 cup of milk of choice. I often find that almond milk gives a lovely, subtle nutty flavor, while oat milk creates a creamier texture. Coconut milk is fantastic if you’re looking for a richer, more indulgent pudding. Whichever milk you choose, make sure it’s fresh and cold for the best results. You want to ensure the chia seeds are fully submerged in the liquid from the start.
2. Add the Sweetener and Vanilla: Next, drizzle in your 1 tablespoon of maple syrup. Maple syrup provides a wonderful, natural sweetness and a hint of caramel notes that complement the chia seeds beautifully. If you prefer a different sweetener, feel free to use agave nectar, honey, or even a sugar-free alternative like stevia or erythritol, adjusting the amount to your personal taste. Following that, add your 1 teaspoon of vanilla extract. Vanilla is essential for adding that classic dessert flavor and aroma, making the pudding feel truly special. Give it a gentle stir to start incorporating these ingredients.
3. The Crucial Stirring and Resting Phase: This is perhaps the most important step for achieving a smooth, lump-free pudding. Stir the mixture vigorously for about 30-60 seconds. You want to make sure all the chia seeds are well dispersed in the liquid and that there are no clumps sticking to the bottom or sides of your bowl or jar. Some people find it helpful to stir a little more at the 5-minute mark after the initial mix. This second stir is key because as the chia seeds begin extract to absorb the liquid, they can sometimes clump together. A quick stir after they’ve had a moment to start their magic will prevent this. I usually do this by gently stirring or swirling the mixture again to break up any nascent clumps.
4. Chill to Perfection: Once you’ve stirred everything thoroughly, cover your bowl or secure the lid on your jar. Place it in the refrigerator for at least 2-3 hours, but for the best consistency, I highly recommend leaving it overnight. This extended chilling time allows the chia seeds to fully absorb the liquid, swell up, and create that signature pudding texture. The longer it sits, the thicker and more pudding-like it will become. Don’t be tempted to rush this process; patience is rewarded with a wonderfully smooth and satisfying pudding.
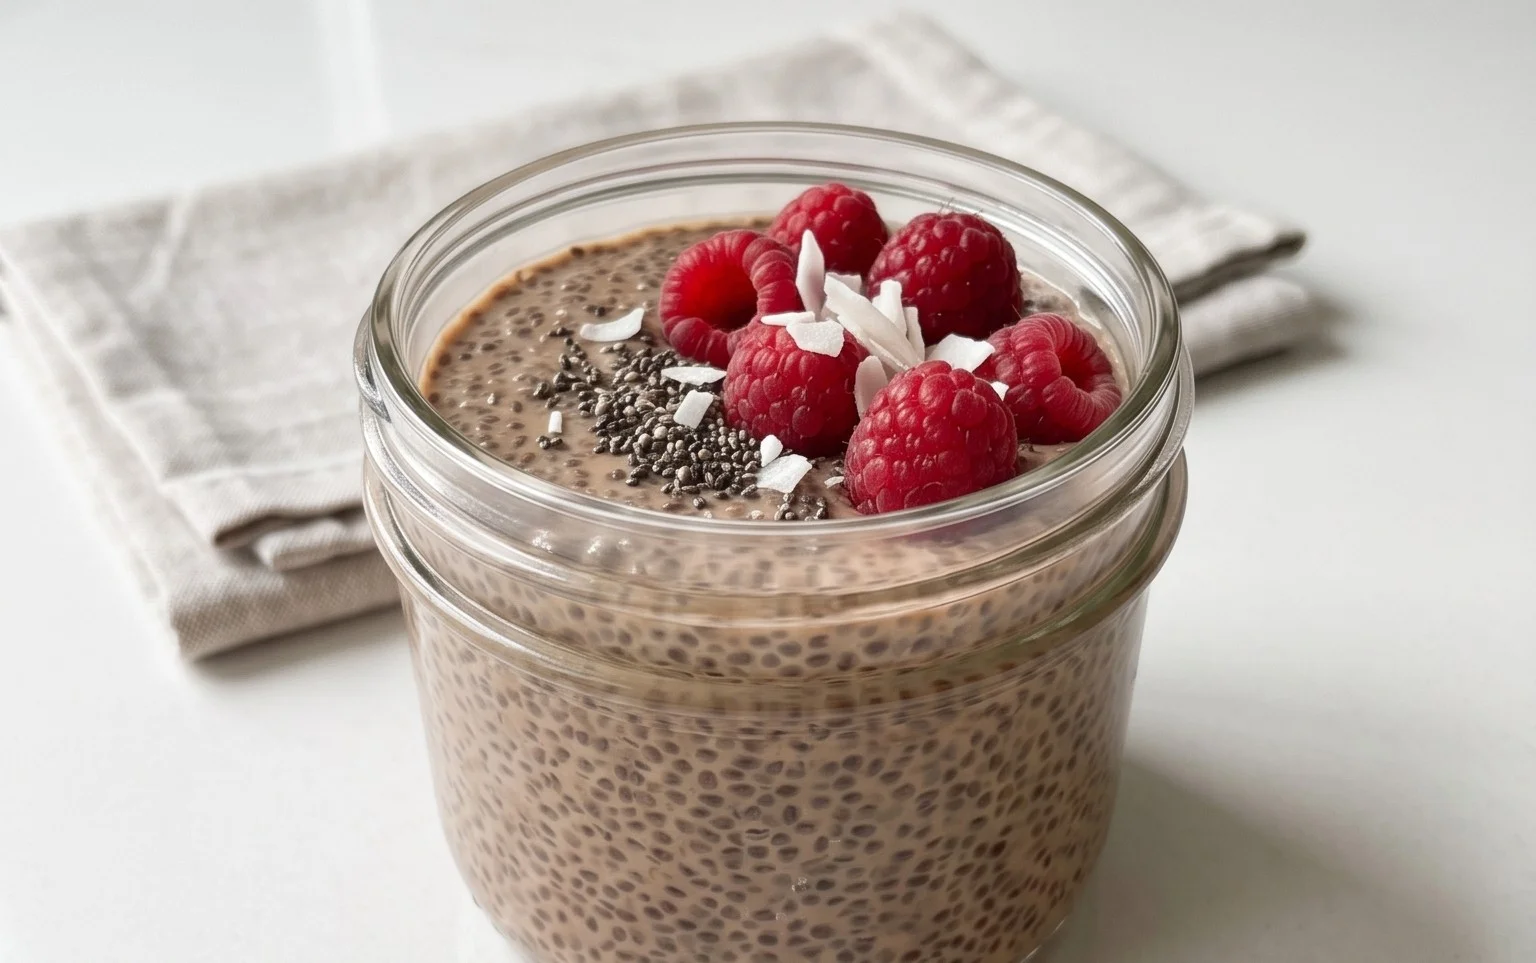
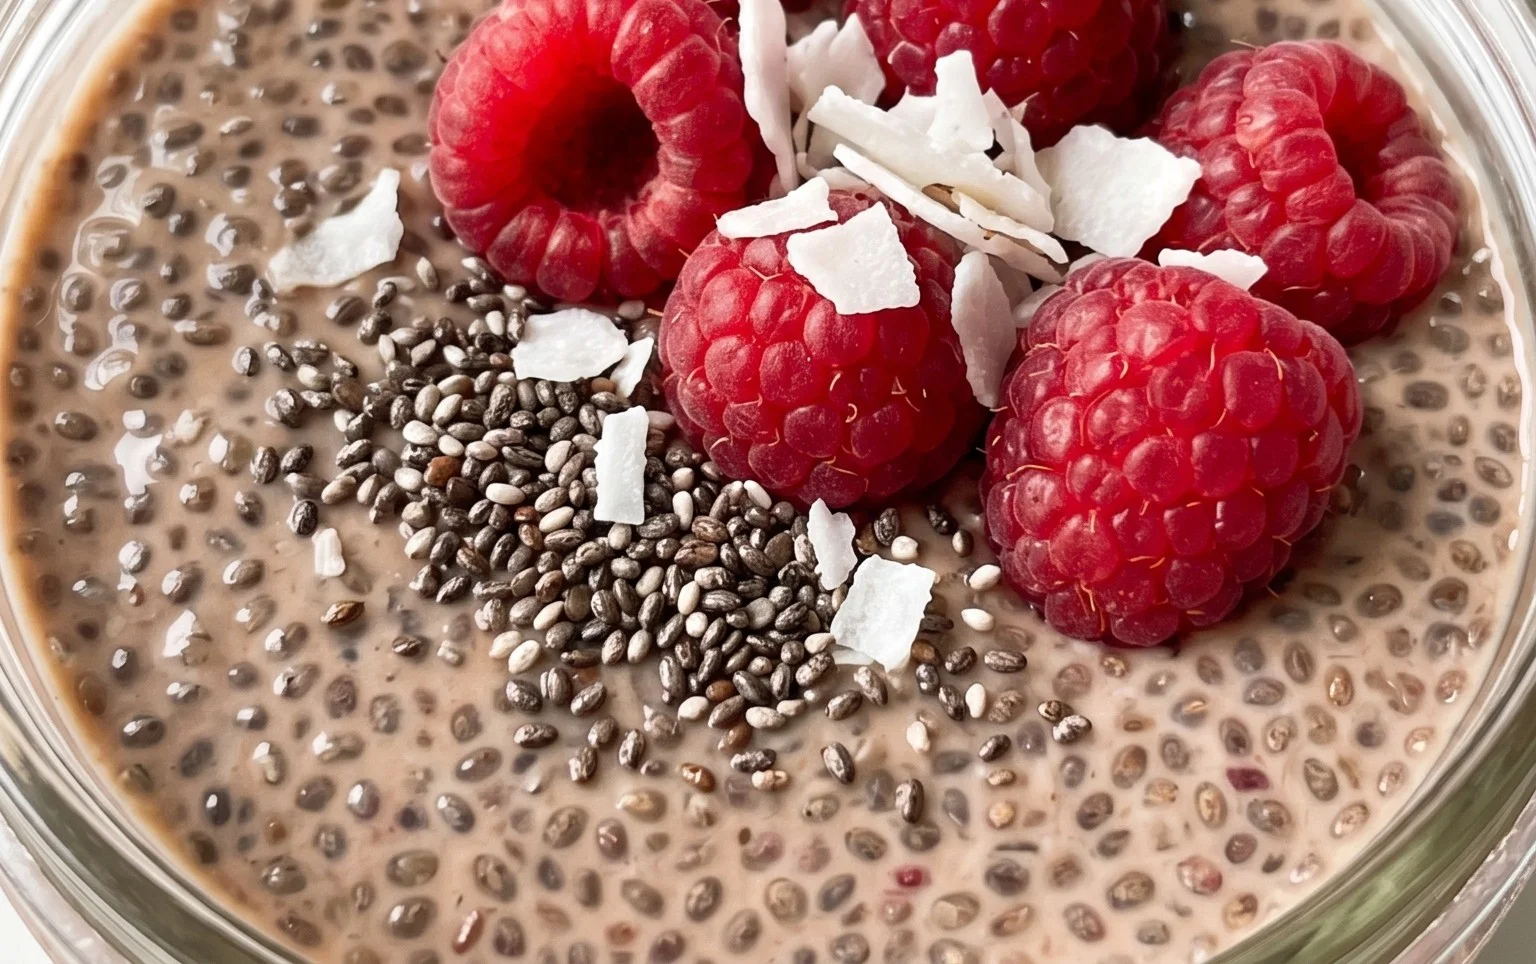
5. Serving and Enjoying: After your pudding has had ample time to chill and thicken, it’s ready to be enjoyed! Give it one final gentle stir before serving. You’ll notice it has a lovely, jelly-like consistency. You can serve it directly from the jar or scoop it into a small bowl. Now comes the fun part: toppings! This is where you can really get creative and customize your chia seed pudding to your heart’s content. Fresh berries like raspberries, blueberries, or sliced strawberries add a burst of freshness and color. A sprinkle of granola provides a delightful crunch. A dollop of yogurt, a drizzle of nut butter, or some toasted coconut flakes are also fantastic additions. For a more decadent experience, consider a few dark chocolate chips or a dusting of cocoa powder. Enjoy your wholesome and delicious creation!
Conclusion:
There you have it – a delightful and incredibly simple chia seed pudding recipe that’s set to become a staple in your breakfast or snack rotation. This recipe is truly fantastic because it’s not only packed with essential nutrients like fiber and omega-3s, but it’s also unbelievably versatile. The creamy, slightly gelatinous texture of the chia seeds, when combined with your liquid of choice, creates a satisfying base that’s perfect for customization. I love how effortlessly it comes together with minimal effort, making it ideal for busy mornings or when you need a healthy treat in a flash. Whether you enjoy it chilled straight from the fridge or topped with fresh berries, granola, or a drizzle of honey, this chia seed pudding is a winner every time.
Don’t be afraid to experiment! Consider adding a swirl of nut butter, a sprinkle of cinnamon, or even some cocoa powder for a chocolatey twist. You can also swap out traditional milk for almond milk, coconut milk, or oat milk to tailor the flavor and dietary needs. I wholeheartedly encourage you to give this recipe a try – you might just discover your new favorite healthy indulgence!
Frequently Asked Questions about Chia Seed Pudding:
Q: How long does chia seed pudding last in the refrigerator?
A: Chia seed pudding typically lasts for 3-5 days when stored in an airtight container in the refrigerator. The texture might become slightly firmer over time, but it generally remains delicious.
Q: Can I make chia seed pudding without milk?
A: Yes, absolutely! You can use water as your liquid base, although the flavor will be much more neutral. For a creamier texture and more flavor, consider using non-dairy milks like almond, soy, oat, or coconut milk, or even fruit juice.
Q: My chia seed pudding is too thick or too thin. How can I fix it?
A: If your pudding is too thick, simply stir in a little more liquid (milk, water, or juice) until you reach your desired consistency. If it’s too thin, you can add a few more chia seeds and let it sit for another 15-30 minutes to thicken up. Remember that chia seeds continue to absorb liquid as they sit.
Chia Seed Pudding Recipe
A simple and healthy vegan chia seed pudding, perfect for breakfast or dessert.
Ingredients
-
3 tablespoons chia seeds
-
1 tablespoon maple syrup
-
1 teaspoon vanilla
-
3/4 cup almond milk
-
1/4 cup berries (optional topping)
-
1 tablespoon nuts (optional topping)
Instructions
-
Step 1
In a bowl or jar, combine the chia seeds, maple syrup, and vanilla. -
Step 2
Pour in the milk of choice and whisk thoroughly to combine. -
Step 3
Let the mixture sit for about 5 minutes, then whisk again to break up any clumps of chia seeds. -
Step 4
Cover the bowl or jar and refrigerate for at least 4 hours, or preferably overnight, until thickened. -
Step 5
Stir well before serving. Add optional toppings like berries or nuts if desired.
Important Information
Nutrition Facts (Per Serving)
It is important to consider this information as approximate and not to use it as definitive health advice.
Allergy Information
Please check ingredients for potential allergens and consult a health professional if in doubt.