Easy Japanese Tuna Onigiri Quick Recipe
15-min. Easy Japanese Tuna Onigiri is your new go-to for a lightning-fast, incredibly satisfying meal. Imagin extracte this: perfectly formed rice balls, warm and comforting, bursting with savory, seasoned tuna. Who doesn’t love that? Onigiri, the beloved Japanese rice ball, has captured hearts worldwide for its simple elegance and portability. It’s the ultimate snack, a delightful lunch companion, or even a light dinner when time is tight. What makes this 15-min. Easy Japanese Tuna Onigiri so special is its ability to deliver authentic Japanese flavor in mere minutes, transforming humble ingredients into something truly craveable. Forget complicated steps and long marination times; we’re diving straight into deliciousness that you can whip up before your hunger pangs even have a chance to settle in.
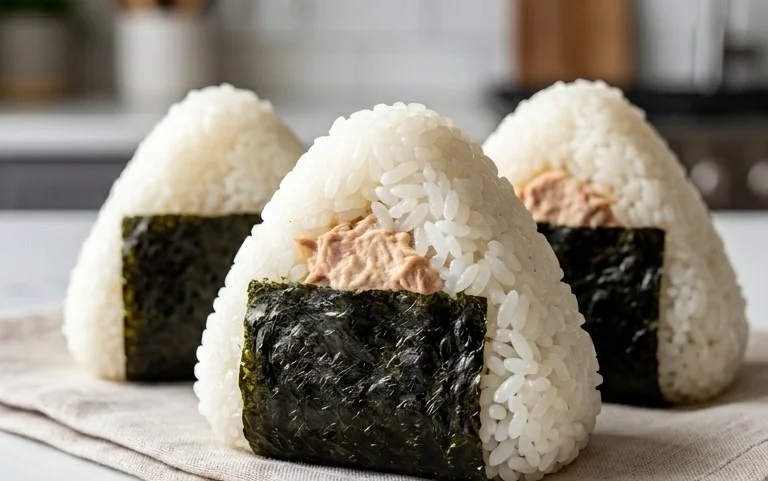
15-Min. Easy Japanese Tuna Onigiri
Welcome to your quick culinary escape! Today, we’re diving into the delightful world of Japanese comfort food with these incredibly simple and speedy 15-minute Tuna Onigiri. These savory rice balls are perfect for a quick breakfast, a satisfying lunch, or even a healthy snack. They’re incredibly versatile, and the combination of fluffy rice, savory tuna, and creamy mayonnaise is utterly irresistible. Plus, they look so cute! Let’s get started and transform simple ingredients into little flavor bombs in no time.
Ingredients:
Crafting Your Flavorful Filling
The heart of our onigiri lies in its delicious filling. For this recipe, we’re keeping it super straightforward with classic tuna and mayonnaise.
First, drain your canned tuna thoroughly. If you’re using tuna packed in oil, gently press out as much oil as you can. If you’re using tuna in water, ensure it’s well-drained. You want the tuna to be moist but not watery, as excess moisture can make your rice balls difficult to form and potentially soggy.
In a small bowl, combine the drained tuna with the Japanese mayonnaise. If you don’t have Japanese mayo, regular mayonnaise will work perfectly fine. Japanese mayo has a slightly richer, tangier flavor due to the use of egg yolks and a hint of vinegar, but the difference is subtle enough that regular mayo will still yield a delicious result. Mix these two ingredients together until the tuna is evenly coated and flaked into small pieces. You can adjust the amount of mayonnaise to your preference – some people like a creamier filling, while others prefer it a bit drier.
Preparing Your Rice
The foundation of any great onigiri is perfectly cooked short-grain rice. The stickiness of short-grain rice is essential for holding the rice ball together. If you’re using leftover cooked rice, gently warm it up before you begin extract. Cold rice can be harder to work with and won’t hold its shape as well.
If you’re cooking fresh rice, make sure to use short-grain Japanese rice for the best texture and stickiness. Cook it according to package directions. Once cooked, transfer the rice to a bowl and sprinkle it with the 1/2 teaspoon of salt. Gently fold the salt into the rice. This is crucial for seasoning the rice itself, as onigiri are not typically seasoned with soy sauce on the outside. The salt will bring out the natural sweetness and flavor of the rice. Be careful not to mash the rice grains; you want them to remain distinct yet sticky.
Assembling Your Onigiri
This is where the magic happens! Working with warm rice is key here. It’s pliable and easy to mold. You might want to have a small bowl of water nearby to moisten your hands slightly. This will prevent the rice from sticking to your palms, making the shaping process much smoother and cleaner. Don’t use too much water; just a light dampening of your hands is sufficient.
Step 1: Portioning the Rice
Take about half a cup of the warm, salted rice and place it in the palm of your hand. Gently press it down to form a rough disc. Don’t overwork the rice at this stage; just get it into a manageable shape.
Step 2: Creating a Well
With your thumb, create a small indentation or well in the center of the rice disc. This well will be where we place our delicious tuna filling. Make sure the well is deep enough to hold a good spoonful of the tuna mixture, but not so deep that it goes all the way through the rice.
Step 3: Adding the Filling
Spoon about a tablespoon of the prepared tuna and mayonnaise mixture into the well you created. You can add more or less depending on how much filling you like in your onigiri.
Step 4: Encasing the Filling
Now, carefully bring the edges of the rice up and around the filling, gently pressing them together to enclose the tuna mixture completely. Think of it like making a little dumpling. Continue to gently press and shape the rice around the filling, forming it into your desired onigiri shape. The most common shapes are triangles or spheres. For a triangle, gently pinch and form three sides with your fingers. For a sphere, cup your hands and rotate the rice ball to create a smooth, round shape. Remember to work gently to avoid crushing the rice grains.
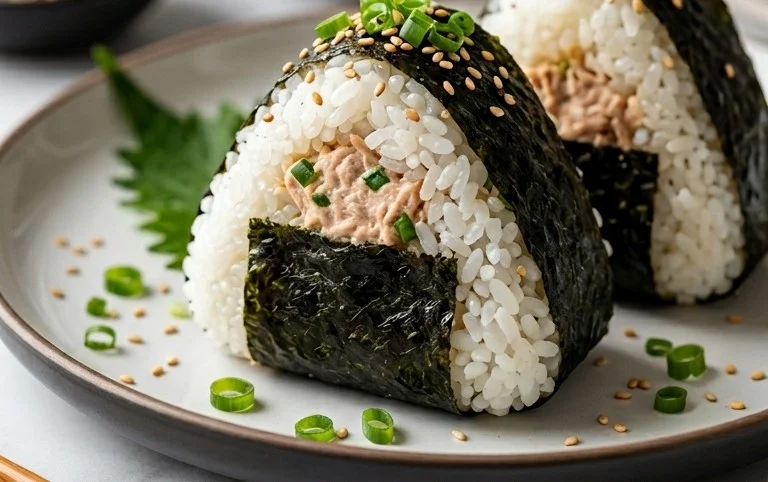
Step 5: Garnishing and Wrapping (Optional but Recommended!)
If you’re using sesame seeds, you can gently roll the formed onigiri in a small dish of sesame seeds to coat the outside. This adds a lovely nutty flavor and visual appeal. If you’re using nori, now is the time to prepare it. Cut your nori sheets into strips, about 1 to 1.5 inches wide. You can then wrap a strip of nori around the bottom of your onigiri, or create a band around the middle. The nori adds a delightful salty crunch and sea-like flavor that perfectly complements the rice and tuna. Don’t worry if your nori doesn’t stick perfectly; the rice is usually sticky enough to hold it in place.
Notes:
Enjoy your delicious, homemade Japanese Tuna Onigiri! They are a testament to how simple ingredients and a few minutes can create something truly satisfying.
Conclusion:
There you have it – a delicious and incredibly easy way to whip up Japanese Tuna Onigiri in just 15 minutes! This recipe is a true lifesaver for busy weeknights, quick lunches, or even a satisfying snack. The combination of fluffy rice, savory tuna filling, and the optional nori wrap is simply irresistible. It’s a fantastic way to enjoy a taste of Japan without a lot of fuss. I love how versatile it is, allowing for endless flavor combinations. So, don’t hesitate to give this quick and delightful recipe a try!
These onigiri are fantastic on their own, but they also pair wonderfully with a light miso soup or a simple green salad for a more complete meal. For variations, consider adding a dash of soy sauce or a sprinkle of sesame seeds to your tuna filling, or even mixing in some finely chopped chives or a bit of kewpie mayonnaise for extra creaminess. Don’t be afraid to get creative and make these Japanese Tuna Onigiri your own!
Frequently Asked Questions:
Can I make the rice ahead of time?
Absolutely! Cooked and cooled sushi rice can be stored in the refrigerator for up to two days. Just be sure to reheat it gently before shaping your onigiri, or you can use it cold if you prefer a slightly firmer texture.
What other fillings can I use?
The possibilities are endless! Other popular fillings include seasoned salmon flakes, umeboshi (pickled plums), seasoned kombu (kelp), or even just plain salt for a classic taste. Get adventurous and experiment!
15-min. Easy Japanese Tuna Onigiri
Quick and simple tuna onigiri, perfect for a light meal or snack. This recipe uses readily available ingredients and comes together in just 15 minutes.
Ingredients
-
2 cups cooked short grain rice
-
1/2 tsp salt
-
5.29 oz canned tuna
-
2 tbsp Japanese mayo
-
2 sheets nori
-
1 tsp sesame seeds
Instructions
-
Step 1
In a bowl, mix the cooked short grain rice with salt. -
Step 2
Drain the canned tuna and flake it into a separate bowl. Mix with Japanese mayonnaise. -
Step 3
Wet your hands with water and lightly salt them to prevent rice from sticking. Take a portion of the rice and flatten it in your palm. -
Step 4
Place a spoonful of the tuna mixture in the center of the flattened rice. Cover with more rice and shape into a triangle or ball. -
Step 5
Wrap each onigiri with a strip of nori. Garnish with sesame seeds if desired.
Important Information
Nutrition Facts (Per Serving)
It is important to consider this information as approximate and not to use it as definitive health advice.
Allergy Information
Please check ingredients for potential allergens and consult a health professional if in doubt.