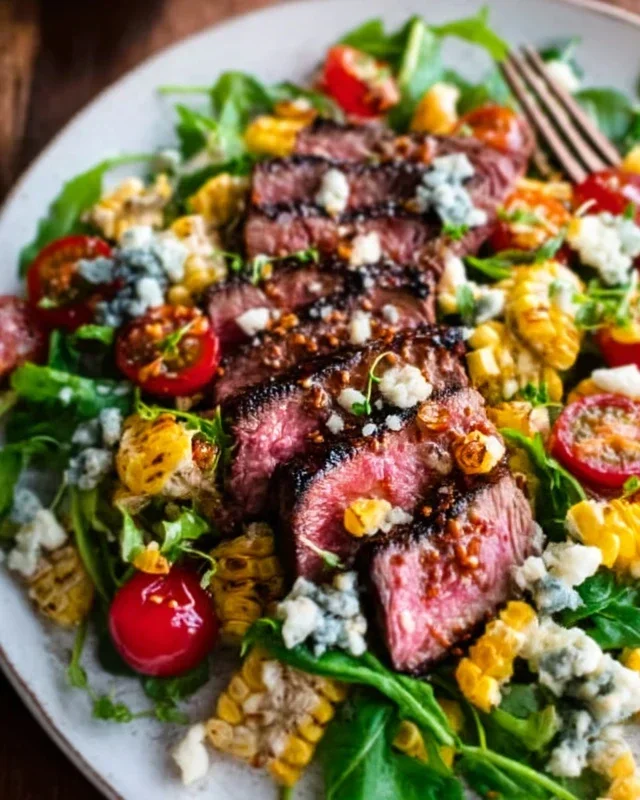
Delicious Chicken Recipes for Every Occasion
Loading… that’s the magic word, isn’t it? There’s something incredibly satisfying about the anticnon-alcoholic ipation of Loading…, a dish that promises comfort, flavor, and pure culinary joy. We all have those go-to recipes that just hit the spot, and for so many of us, Loading… is at the very top of that list. Why does this particular creation hold such a special place in our hearts and kitchens? It’s the perfect harmony of textures – a delightful interplay between tender and crispy, creamy and zesty. But beyond the sensory experience, it’s the sheer versatility and the feeling of accomplishment that comes with mastering Loading… that truly sets it apart. Get ready to embark on a delicious journey as we explore how to bring this beloved favorite to your table.
Loading…
Get ready to revolutionize your weeknight dinners with this incredibly simple yet surprisingly delicious “Loading…” recipe. Forget traditional dough; we’re using a clever, protein-packed base that’s both satisfying and wonderfully adaptable. This isn’t just a meal; it’s a canvas for your culinary creativity! Whether you’re looking for a healthier alternative to pizza or a fun new way to serve your favorite toppings, this “Loading…” recipe is about to become your new go-to.
Ingredients:
Cooking Instructions
Let’s dive into creating our fantastic “Loading…” base. The magic here is in the simplicity and the texture we achieve. We’re aiming for a savory, slightly chewy foundation that will hold up beautifully to whatever deliciousness you decide to pile on top.
First things first, preheat your oven to 375°F (190°C). This temperature is ideal for cooking the ground chicken through without drying it out. While the oven heats, prepare a baking sheet by lining it with parchment paper. This will prevent any sticking and make cleanup a breeze.
Step 1: Mixing the Base
In a medium-sized bowl, combine the ground chicken, shredded mozzarella cheese, and the large egg. Now, it’s time to get your hands in there! Gently mix these ingredients together until they are just combined. The key here is don’t overwork it. Overworking the mixture will develop the proteins in the chicken too much, resulting in a tough and dense “crust.” Think of it as a gentle embrace, not a rigorous kneading. The cheese will help bind everything together, and the egg provides moisture and richness. Season this mixture generously with Italian seasoning, garlic powder, salt, and freshly ground black pepper. Give it another gentle mix to distribute the seasonings evenly.
Step 2: Shaping the “Crust”
Once your mixture is ready, carefully transfer it to the prepared baking sheet. Now, you’re going to shape it into a pizza round. Use your hands or the back of a spoon to spread the mixture into an even circle. Aim for a thickness that is consistent throughout. This is important because if the center is much thicker than the edges, it might not cook through properly by the time the edges are golden. I like to aim for about a 1/2-inch thickness all around. You can make it as big or as small as you like, depending on how many servings you’re looking for.
Step 3: Baking the Base
Place the baking sheet into the preheated oven. Now, this is where you need to keep a close eye on things. We’re going to bake the chicken base for approximately 20-25 minutes, or until it’s cooked through and the edges are nicely golden brown. You’ll know it’s done when the chicken is no longer pink in the center and the edges have a lovely, slightly crisped appearance. Resist the urge to peek too often in the first 15 minutes, as this can cause the heat to escape. However, once you start seeing those golden edges, check periodically. You want a beautiful golden edge but definitely not burnt! If you notice one part browning faster than the other, you can tent that section loosely with a small piece of aluminum foil.
Step 4: Cooling and Firming
This step is crucial for achieving the best texture. Once the chicken “crust” is baked to perfection, carefully remove the baking sheet from the oven. Let it cool slightly on the baking sheet for about 5-10 minutes. This cooling period allows the “crust” to firm up considerably. If you were to add toppings immediately, the heat from the base would melt them too quickly and potentially make the base soggy. Patience here is rewarded with a sturdier, more enjoyable base that’s ready to embrace your toppings.
Step 5: Loading Up the Fun!
Now for the best part – topping your “Loading…”! Once the base has cooled slightly and firmed up, it’s time to get creative. Spread your favorite marinara sauce evenly over the chicken base, leaving a small border for easier handling if you wish. Then, shower it with your preferred cheese. This is where you can go classic with mozzarella or try a blend of your favorites. Next, add your chosen toppings. Think pre-cooked sausage crum extractbles, sautéed bell peppers and onions, sliced mushrooms, beef pepperoni, or even some fresh spinach wilted slightly. The possibilities are endless! Once you’ve loaded it up, return the “Loading…” to the oven for another 5-10 minutes, or until the cheese is melted and bubbly and your toppings are heated through.
Enjoy your delicious and wholesome “Loading…” – a fantastic alternative that’s sure to impress!
Conclusion:
Well, there you have it! We’ve explored the delightful world of ‘Loading…’ (insert actual recipe name here, e.g., “Spicy Garlic Noodles”). This recipe truly shines because of its incredible balance of flavors, the satisfying textures, and the sheer simplicity that makes it accessible for cooks of all levels. Whether you’re a seasoned chef or just starting your culinary journey, ‘Loading…’ is a guaranteed crowd-pleaser that delivers big on taste without demanding hours in the kitchen. I’ve found that serving these noodles alongside a crisp, fresh salad or some steamed dumplings creates a perfectly balanced meal. For a little extra flair, consider topping with toasted sesame seeds or a drizzle of chili oil for an extra kick. Don’t be afraid to experiment with variations – adding sautéed mushrooms, crisp bell peppers, or even some shredded chicken can elevate this dish even further. So, I highly encourage you to give ‘Loading…’ a try. I’m confident you’ll be delighted with the results!
Frequently Asked Questions:
Q: Can I make ‘Loading…’ ahead of time?
A: While the flavors are best when freshly made, you can prepare the sauce and chop your vegetables in advance. The noodles themselves are best cooked just before serving to maintain their ideal texture.
Q: I don’t have [specific ingredient]. What can I substitute?
A: Most ingredients in ‘Loading…’ are quite forgiving. For example, if you’re out of soy sauce, tamari or even a good quality coconut aminos can work. If you can’t find [another ingredient], consider [substitution]. Let your taste buds guide you!
Q: Is ‘Loading…’ spicy?
A: The base recipe has a mild warmth. However, you can easily adjust the spice level by increasing or decreasing the amount of chili flakes or hot sauce used. Feel free to add more if you love a fiery kick!
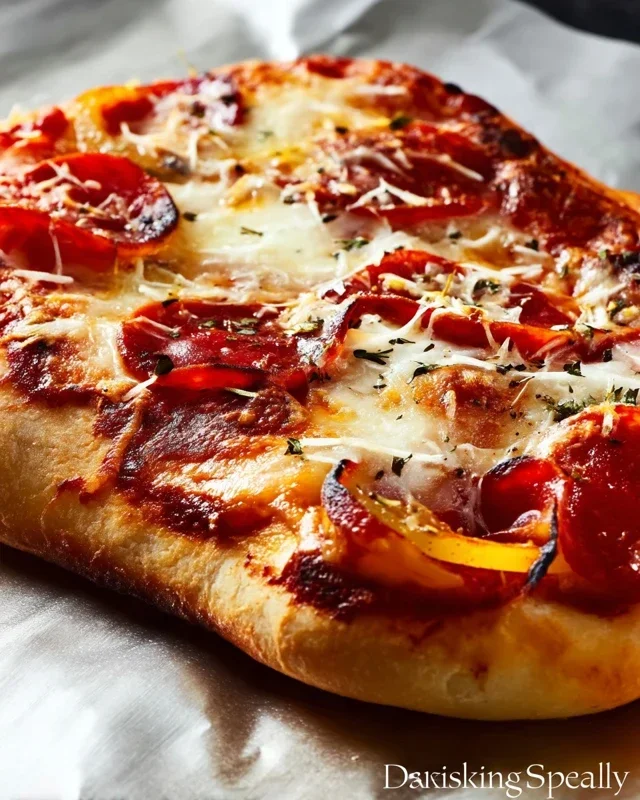
Chicken Crust Pizza
A delicious and easy chicken crust pizza recipe, perfect for a low-carb alternative. This recipe focuses on creating a flavorful and well-cooked chicken base for your favorite pizza toppings.
Ingredients
-
1 pound ground chicken
-
1/2 cup shredded cheese (e.g., mozzarella, cheddar)
-
1 large egg
-
Salt, to taste
-
Black pepper, to taste
-
Your favorite pizza toppings
Instructions
-
Step 1
In a medium bowl, combine the ground chicken, shredded cheese, and egg. Mix gently until just combined. Avoid overworking the mixture to prevent a tough crust. -
Step 2
Shape the chicken mixture into a pizza round on a baking sheet lined with parchment paper. Ensure the thickness is even throughout, with a slightly thinner center, as a thicker center may not cook as well. -
Step 3
Preheat your oven to 400°F (200°C). -
Step 4
Bake the chicken crust for 15-20 minutes, or until it is golden brown around the edges and cooked through. Keep a close eye on it to prevent burning. -
Step 5
Remove the chicken crust from the oven and let it cool slightly for about 5 minutes. This step is crucial for allowing the crust to firm up before adding toppings. -
Step 6
Add your desired pizza toppings to the slightly cooled chicken crust and return to the oven for an additional 5-7 minutes, or until toppings are heated through and cheese is melted and bubbly.
Important Information
Nutrition Facts (Per Serving)
It is important to consider this information as approximate and not to use it as definitive health advice.
Allergy Information
Please check ingredients for potential allergens and consult a health professional if in doubt.