Perfect Ramen Eggs Ajitama – Easy Marinated Recipe
Ramen eggs, or ajitama, are more than just a topping; they’re a culinary revelation. You’ve seen them, haven’t you? Those perfectly jammy, custardy yolks swimming in a deeply savory, umami-rich marinade, nestled atop a steaming bowl of ramen. My obsession with these magical marinated eggs began years ago, and honestly, I can’t imagin extracte a bowl of ramen without them. They transform a simple noodle soup into an experience, adding a layer of luxury and complex flavor that’s simply irresistible. What makes ramen eggs so special? It’s the alchemy of a perfectly cooked egg meeting a brine that infuses it with everything delicious. That subtle sweetness, the hint of soy and non-alcoholic mirin, the whisper of gin extractger – it all creates a flavor bomb that explodes in your mouth with every bite. They’re surprisingly simple to make at home, and once you master the art of the perfect ramen egg, you’ll be adding them to everything!
Ramen Eggs (Ajitama)
There’s something undeniably special about ramen eggs, also known as Ajitama. That perfectly jammy, molten yolk nestled within a tender, flavorful white is the crowning glory of any steaming bowl of ramen. They aren’t just an ingredient; they’re an experience. And the best part? They’re surprisingly easy to make at home. Forget settling for plain hard-boiled eggs in your noodles. Elevating your ramen game with these marinated marvels is a simple yet incredibly rewarding culinary endeavor.
The magic of Ajitama lies in the marinade. A balance of salty, sweet, and savory elements seeps into the egg, transforming a humble staple into a delicacy. I’ve experimented with many marinades over the years, but this one consistently delivers that perfect flavor profile that has me craving more. It’s a simple blend that requires minimal effort but yields maximum deliciousness. You can even make a big batch and keep them in the fridge for up to a week, ready to transform any meal into something spectacular. They’re not just for ramen, either! These eggs are fantastic on top of rice bowls, in salads, or even just enjoyed on their own as a protein-packed snack.
Ingredients:
Note: Using eggs that are a few days old can make them easier to peel after boiling. Fresh eggs can sometimes be a bit more challengin extractg.
Cooking Instructions:
Boiling the Eggs
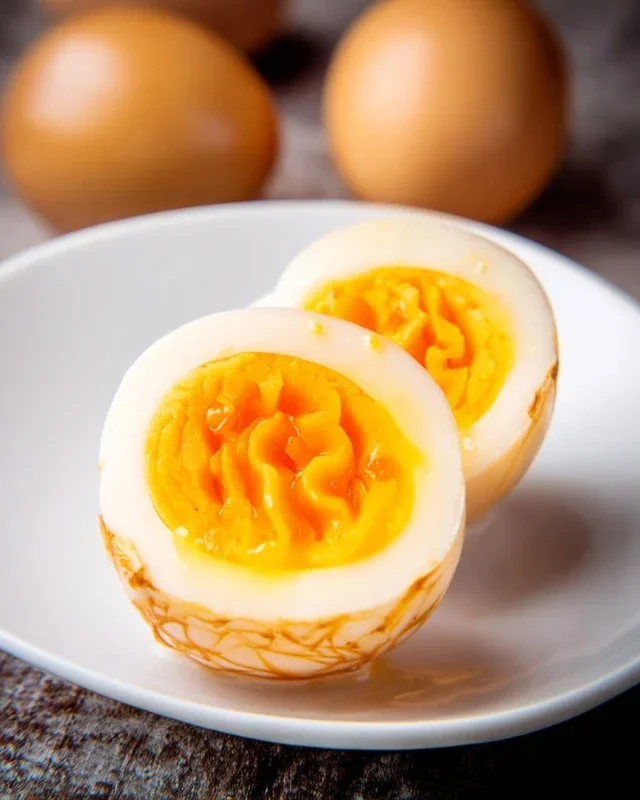
The first, and perhaps most crucial, step in creating perfect Ajitama is achieving the ideal soft-boiled egg. We’re aiming for a glorious, jammy yolk that isn’t quite runny but not fully set. This stage is key to the signature texture of ramen eggs.
1. Prepare your boiling water: In a medium saucepan, bring enough water to a rolling boil to fully submerge your eggs. Some people like to add a splash of vinegar to the boiling water; this is said to help the egg whites coagulate more quickly if an egg cracks, making them easier to clean up. While I don’t always find it strictly necessary, it’s a good habit if you’re concerned about breakage. Carefully lower your eggs into the boiling water using a slotted spoon or a spider strainer. Avoid dropping them in, as this can cause them to crack.
2. Boil for precisely 6.5 to 7 minutes: This is the sweet spot for that perfect jammy yolk. Set a timer immediately once the eggs are in the water. Do not overcook them, or you’ll end up with a fully hard-boiled yolk, which isn’t the desired texture for Ajitama. For a slightly firmer jammy yolk, aim for 7 minutes. For a more molten center, 6.5 minutes is usually perfect. Keep the water at a gentle, consistent boil throughout this period.
3. Prepare the ice bath: While your eggs are boiling, prepare an ice bath by filling a medium bowl with cold water and plenty of ice cubes. As soon as your timer goes off, immediately transfer the eggs from the boiling water into the ice bath. This rapid cooling process, called shocking, is vital for stopping the cooking process instantly. It prevents the eggs from continuing to cook from residual heat, which would result in a harder yolk. Let the eggs sit in the ice bath for at least 10-15 minutes, or until they are completely cool to the touch. This also helps to firm up the egg whites, making them easier to peel.
Marinating the Eggs
Once your eggs are perfectly boiled and cooled, it’s time to create the flavorful marinade that will transform them into Ajitama. This is where all the deliciousness truly happens.
4. Peel the cooled eggs and prepare the marinade: Gently peel the cooled eggs. The ice bath should have made this process much easier, but if you encounter any stubborn spots, a little patience goes a long way. You can gently tap the egg on a hard surface all over to loosen the shell before peeling. In a small saucepan or microwave-safe bowl, combine the soy sauce, water, non-non-non-alcoholic alternativeic non-alcoholic mirin, and granulated sugar. Stir well until the sugar has completely dissolved. You can gently heat this mixture on the stovetop over low heat until the sugar is dissolved, or microwave it for about 30-60 seconds. You don’t need to bring it to a boil; we just want to ensure the sugar is fully incorporated. Let the marinade cool slightly before proceeding.
5. Marinate the eggs: Place the peeled, cooled eggs into a resealable bag or a small container. Pour the cooled marinade over the eggs, ensuring they are fully submerged. If using a bag, gently squeeze out as much air as possible before sealing it. If using a container, make sure the liquid covers the eggs. For optimal flavor penetration, I like to place the bag or container in the refrigerator for at least 4 hours, but ideally, 12 to 24 hours is even better. The longer they marinate, the deeper the flavor will be. You can gently turn the eggs every few hours to ensure they marinate evenly on all sides. Once they’ve marinated to your satisfaction, your Ajitama are ready to be enjoyed! Slice them in half lengthwise to reveal that beautiful, jammy yolk and add them to your favorite ramen or enjoy them as a delicious snack.
Conclusion:
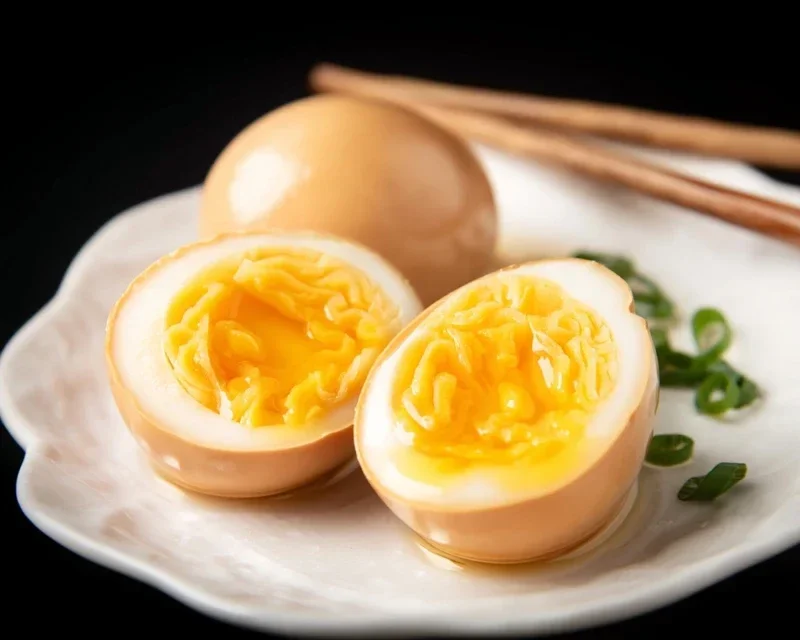
There you have it! Crafting perfect ramen eggs, or ajitama, is surprisingly simple and incredibly rewarding. These soy-marinated delights are a game-changer for any ramen bowl, adding a burst of savory, umami-rich flavor and that signature jammy yolk that we all adore. The beauty of this recipe lies in its flexibility and the sheer satisfaction of achieving that restaurant-quality taste right in your own kitchen. Whether you’re a seasoned ramen enthusiast or just dipping your toes into homemade noodle soup, incorporating these ramen eggs is a fantastic way to elevate your culinary creations.
I encourage you all to give this recipe a try! It’s a wonderfully versatile ingredient that doesn’t just stop at ramen. Think of them sliced over avocado toast, tossed into a salad for an extra protein punch, or even enjoyed as a standalone snack. Don’t be afraid to experiment with the marinade; a touch of non-alcoholic mirin for sweetness, a splash of non-alcoholic sake for depth, or even a pinch of chili flakes for a hint of heat can all add exciting new dimensions to your ajitama.
Frequently Asked Questions:
How long do ramen eggs last in the refrigerator?
Once marinated, your ramen eggs will keep well in the refrigerator for up to 3-4 days. Make sure to store them in an airtight container with some of the leftover marinade to keep them flavorful and moist.
Can I use a different type of soy sauce?
Absolutely! While traditional Japanese soy sauce is recommended for its balanced flavor, you can experiment with others. For a richer, more intense flavor, try dark soy sauce, but be mindful that it will also darken the color of your eggs. Low-sodium soy sauce can also be used, but you might need to adjust the saltiness to your preference.
What is the best way to peel the eggs without damagin extractg them?
The key to easy peeling is to shock the eggs immediately after boiling by plungin extractg them into an ice bath. This helps the membrane separate from the egg white. After chilling, gently tap the egg on a hard surface and then roll it around to crack the shell all over. Peel under cool running water for the smoothest results.
Ramen Eggs (Ajitama)
Perfectly marinated soft-boiled eggs for your ramen, with a rich, savory flavor.
Ingredients
-
6 large egg
-
½ cup soy sauce (light sodium)
-
¼ cup water
-
¼ cup non-alcoholic mirin
-
2 tablespoons granulated sugar
-
1 teaspoon rice vinegar
Instructions
-
Step 1
Bring a pot of water to a boil. Gently add the eggs and cook for 7 minutes for a perfectly jammy yolk. -
Step 2
While eggs are boiling, prepare an ice bath. -
Step 3
Once cooked, immediately transfer the eggs to the ice bath to stop the cooking process and make them easier to peel. -
Step 4
Carefully peel the cooled eggs and set aside. -
Step 5
In a resealable bag or container, combine soy sauce, water, non-alcoholic mirin, granulated sugar, and rice vinegar. Stir until sugar is dissolved. -
Step 6
Place the peeled eggs into the marinade, ensuring they are fully submerged. Marinate in the refrigerator for at least 12 hours, or up to 2 days for a deeper flavor. -
Step 7
Remove eggs from marinade and slice in half before serving.
Important Information
Nutrition Facts (Per Serving)
It is important to consider this information as approximate and not to use it as definitive health advice.
Allergy Information
Please check ingredients for potential allergens and consult a health professional if in doubt.